
Photoshop is the most recognized and used program for editing photos and images, this program can be downloaded to any tablet, PC or mobile device. Perfect for making retouches and montages to your photos anywhere and in a professional way, edit your selfie and upload the best image to your networks.
You already know how to use Photoshop to edit your photos online and now you want an effect to make them look really great, here we will teach you how to create an effect that simulates how a photo looks after breaking it into pieces.
This effect is known as strips of paper, it is an avant-garde style that is becoming increasingly popular, it is super easy to use even if you do not master the main Photoshop tools, learn with us how to do it. Just follow the steps below and watch it become one of your favorite Photoshop graphic effects.
- Create a new document in Photoshop, then select the image you want to apply the effect to by dragging it onto the new document
- Choose non-destructive editing, this option will leave a copy of your original photo or image that you can use for other graphic effects.
- Add the percentage you want to use for the width of the strip and the image will be divided into sections.
- With the “alt” key and keeping the cursor between the rectangles, we will create a new layer by pressing the “alt” + “delete” key.
- You’ll place the guidelines by dragging the edges creating a rectangle, then you’ll create a clipping mask. This will serve you for other graphic effects.
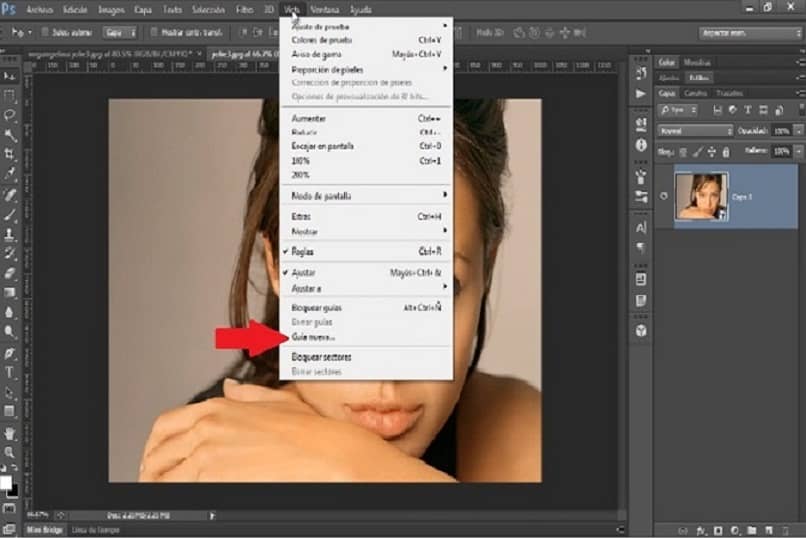
- Click on the image on the left side select the smart object option, in the view option toolbar press “new guide”.
And this is how the strips of paper are created, you can use them in any image that you like and vary a lot with other effects of light, shadow and color. These steps are very important to make the effect of strips of paper in a professional way, now using the tools you will be able to change the position of the strips, the inclination and place more effects on them.
The graphic effects that the Photoshop program brings are almost unlimited and as simple to use as converting a photo to black and white, when you use the tools you will no longer want to keep any original photo.
Another textured paper effect, which you can apply using Photoshop
We will give you another alternative to make graphic effects with paper texture, you can easily apply it to all your images, making that photo that you like so much stand out.
- Repeat it (step 1) to create a new document.
- Then you will create a new layer with the commands “Ctrl” + “Shift” + “N”
- Now we will color our layer by selecting the paint pot and the tone you prefer.
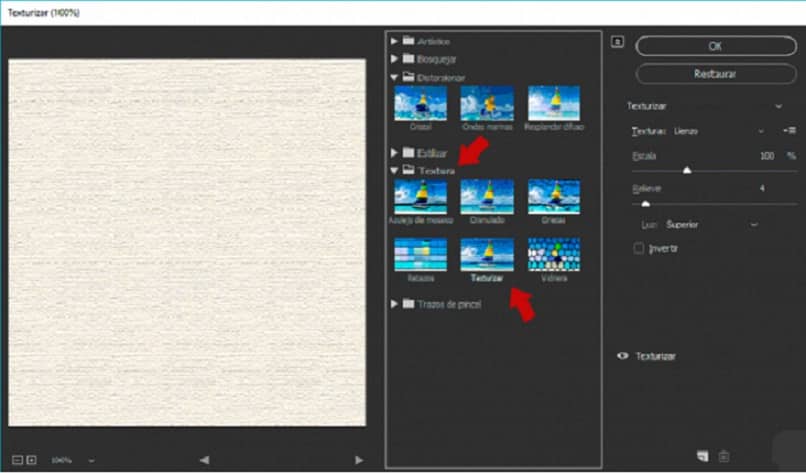
- In the toolbar look for filters, press the option “filter gallery” and select “texture” and copy this layer with the keys “Ctrl” + “Shift”
- To this new layer you will apply a filter that you will select in “filters-others-displacement” in the toolbar.
With these steps we will teach you how to create the graphic effect of textured paper, save it as a new document that will allow you to use it in different projects without having to cut your image. Now you have another graphic effect to easily apply to all your images, you can highlight that photo that you like so much and carry out any editing project you need.
With this graphic effect you get a worn and somewhat careless style evoking the 70s, giving the retro feeling that is so fashionable in design. If you want more information on how to make graphic effects in Photoshop, be sure to read our articles and if you liked this tea before leaving, leave us your comment.