
The world of photography has advanced by leaps and bounds in recent years. Far away are the memories of those cart cameras that have been replaced by digital cameras. These not only allow us to store photos and then upload them to our computer, but also store additional information associated with the captured image, such as metadata that allows us to know exactly where a photo was taken.
If we are not related to the world of photography, it is possible that we have not been talking about metadata. It is therefore information that is associated with our photos in which relevant data can be stored about the camera or the device with which the snapshot was taken, the exact date and time, the place where it was taken, etc. .
Know the place where a photo was taken
the location data is exported in a CSV file in which we can see next to the name of the image, the exact coordinates of the place where each of the photos was taken. That is why, if we want to know where a photo was taken, we will be able to access exactly that information, even if we do not remember it, for which we can use different tools.
windows photos
Both Windows 10 and Windows 11 have their own application with which you can view photos. This is called Photos and is installed by default in the operating system, so if we click on any image, this application will open by default. With this software you can automatically tag the photos, recognizing objects in them and being able to search our entire collection.
With the Photos application we will be able to see hidden and relevant information that is found within any image. To access it, once the image is open, we click on the Information icon that we find in the upper right part or through the keyboard shortcut “Alt + Enter”.
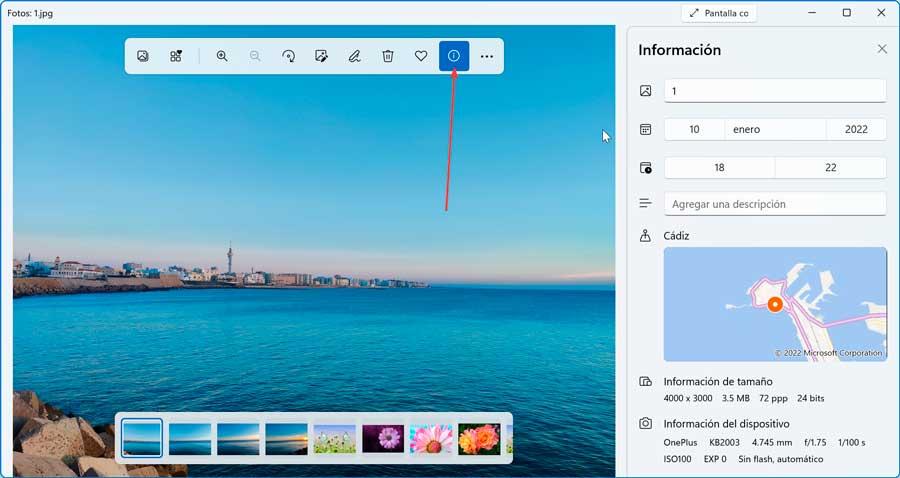
Next, a panel appears on the right side with all the information related to the selected image, such as its name, the date of capture, the size, where the photo was taken or the path to where it is stored.
BR’s EXIFextract
We are talking about free software that will allow us to extract the location of one or several photos. Through its use, the program allows us to indicate what data we want to extract in the CSV file, such as latitude, longitude, date, time, address, etc. To do this, simply download its installation file from the developer’s website. Although the program is officially in beta phase, it can be used perfectly.
Once downloaded, we install it in a matter of seconds, since the entire process is carried out in a simple way through its assistant. We then run it and verify that BR’s EXIFextracter has an interface that is in English. We simply have to click on Folder to scan to select the folder where the desired photo is located. In the Output filename section we must select the path where we want it to be saved and assign it a name along with the CSV extension.
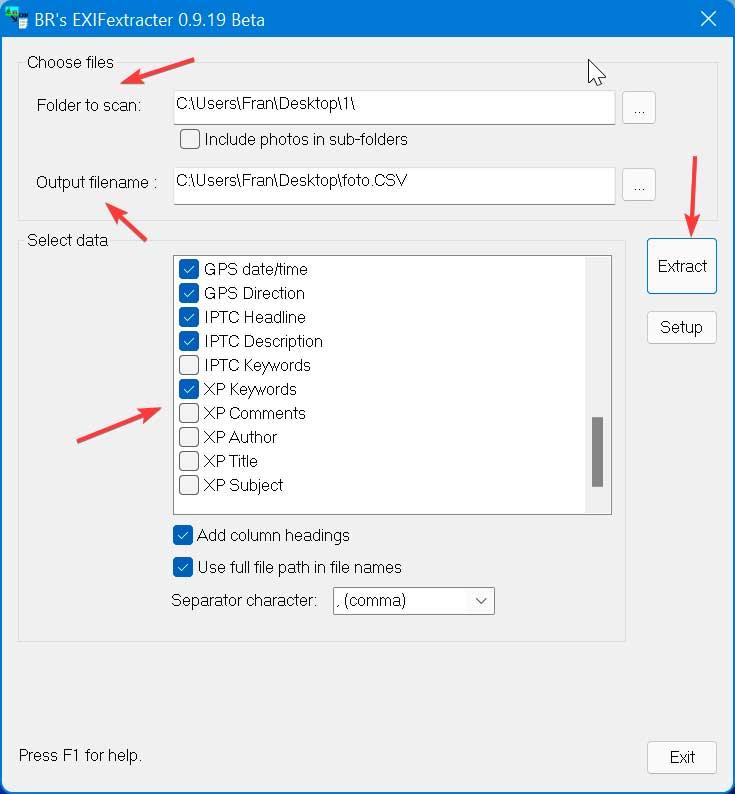
Next, we select the tags we want to extract such as date and time, camera model, lens, file size, aperture, GPS related information (latitude, longitude, altitude, date, time, and address). Once finished, press the Extract button.
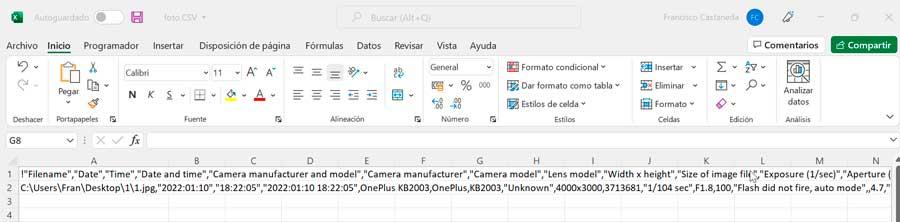
This will generate a CSV file that will contain all the data that we have selected to be extracted and we can open it with Excel, Libre Office or another program that is compatible with this type of file.
exiftool
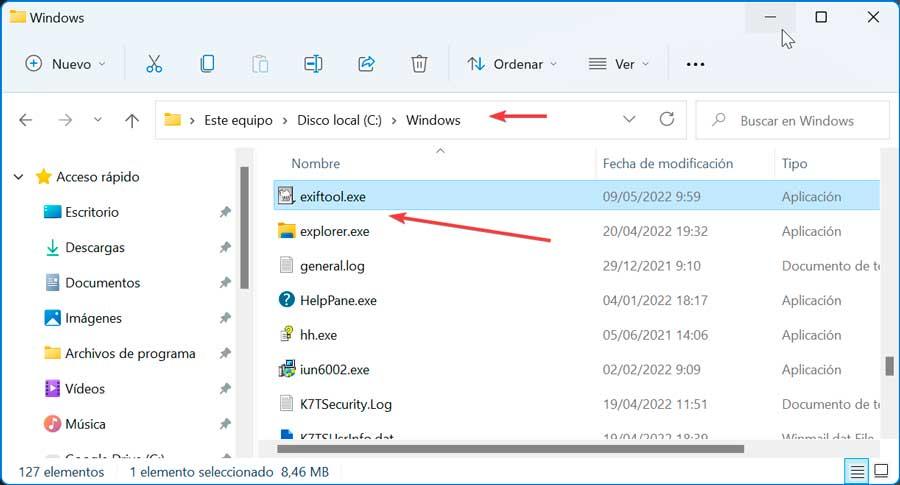
This is another software specially designed to extract the location of our photos, but this time, instead of having a graphical interface, it is based on the command line. We can download it for free from their official website.
For ExifTool to work properly, we simply have to download its EXE file and place it in the C:/Windows folder so that it is accessible from any folder in Windows.
Next, we can now navigate to where we have saved the photos. Later we open a command prompt window and execute the following command:
exiftool -csv -filename -gpslatitude -gpslongitude -gpsaltitude -T *.jpg >out.csv
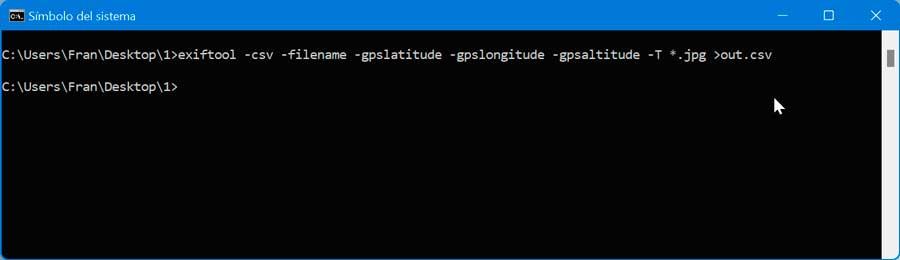
This command will be the one that will export us to a CSV file with all the information about the exact place where each photo was taken, such as GPS longitude, GPS latitude and GPS altitude. So we can open it with Excel or another similar program.

Websites to add a geographical location
Whether our photos already save the geolocation or not, we will be able to add or modify it through a series of free websites. To do this, we will simply have to visit the website in question, upload our photo and they will automatically detect if the photos already have the geographical location saved in the metadata or not. In any case, we can indicate ourselves the exact coordinates where we took the photos or modify the existing ones.
geolmgr
It is a web page that allows you to geotag photos from the browser. Therefore, we can upload a photo on the web and later add new information about the geographical location where the photo was taken within the metadata or modify the existing one. To do this, all you have to do is select the exact point on a map that the website itself shows and obtain the coordinates. To do this, just access your website.
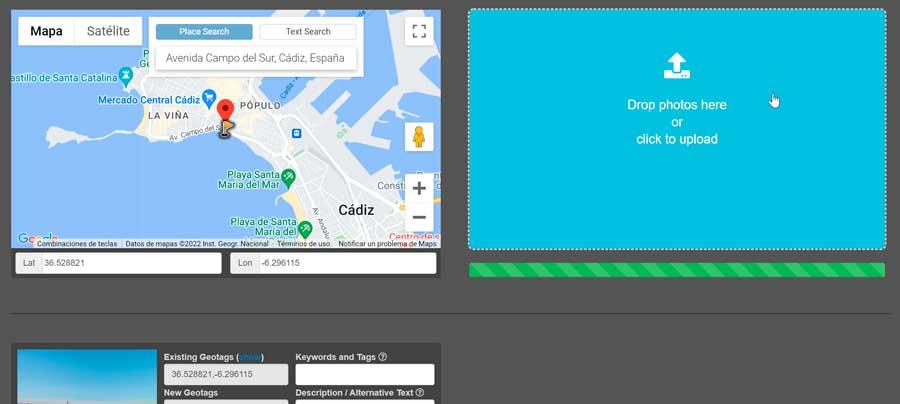
Once on the web, we simply have to drag and drop the photo on its interface or click on the blue window to load the desired image. Once loaded, a map will appear on the left side where it will indicate the place, being able to enlarge the photo until the exact point is found. In the Place Search tab we can indicate the name of the street or the place where it was taken so that it is added to the photo.
Geotg.online
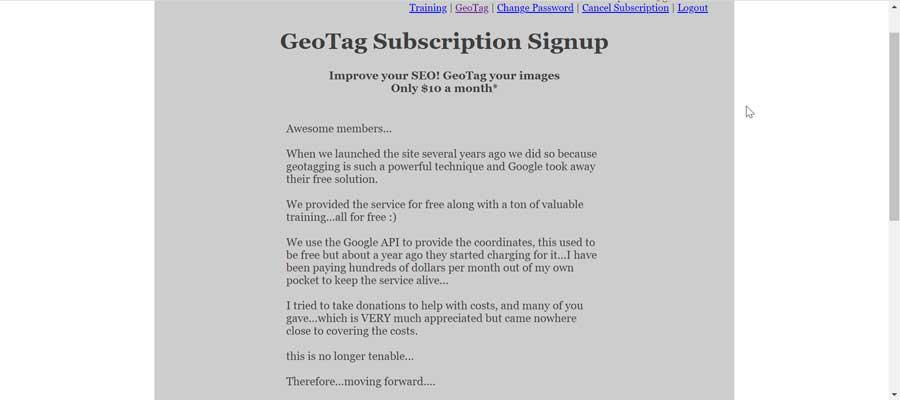
This is another online tool that we can use to add information about the exact geographical location where our photos were taken. When this website was launched several years ago, Google geotagging was free, something that is not free today, so the website has stopped offering its services for free. Therefore, in order to use their services, it will be necessary to register and purchase a subscription of 10 dollars per month. If we want to hire him, we must access the developer’s website.
Geolocation websites that no longer work
Since Google’s geolocation service is no longer free, many websites that offered this service free of charge have ceased to be operational and no longer work. Many of them were very popular and used by thousands of users around the world.
These are some examples that have already stopped working.
-
GeotagMyPhoto: This was a website from where we could geotag photos. To do this, we simply had to upload our photo and then we were shown Google Maps so that we could select the exact geographical location where the photo was taken.
-
UrbanBird.io: another website that has stopped working and from which it was also possible to add or modify the information stored in the metadata of a photo about the exact geographical location where the photo was taken. It was only necessary to upload the photo to the web and from the editor itself, choose the geographical location on a map.
-
CSC-Search.com: This was another interesting website, especially aimed at store owners, businesses or other businesses. The website offered an online tool to tag our photos with a geographical location and that also offered the possibility of adding additional information related to the business. In this way, it was easy to position stores, small businesses or companies on a map.