When working with our Windows computer, we may have to use an application to take notes or program from it. Microsoft’s operating system incorporates its own editor called Notepad, which suffers from being too simple, so many choose to install Notepad++, which is not only more complete with the tools that it has by default, but we can also see it increased its functions by using plugins.
That is why, if we regularly use Notepad++, it can be of great interest to us to learn more about its complements, so that we can learn to install and manage them, in order to give our program new possibilities that can help us. help in our work.
In order to carry out this task, we are going to use the plugin manager that the program has by default. Without a doubt, it is the best way to expand the capabilities of this program, although we will also see how to do it manually. Likewise, we will also see that it is possible to install these add-ons manually, without having to use the program’s interface. Whether through the administrator itself, or manually, today we are going to see how we can install, update and remove add-ons in Notepad++.
Install plugins from admin
To make it easier for us to install plugins, Notepad++ itself has its own plugin manager. Through its use, we will be able to control the arrival of these additional elements, and although in the latest version of the application it is called “Manage Plugins”, it refers to exactly the same thing, but with a different name. From here, we can install, update and remove the included plugins, as we will see below.
To start we run the program, which, if we do not have it, we can download it from the website of its developer, and its main interface will appear. In it we see different tabs at the top, among which we must click on the Plugins. This will open a small drop-down menu, where we select the Manage Plugins option.
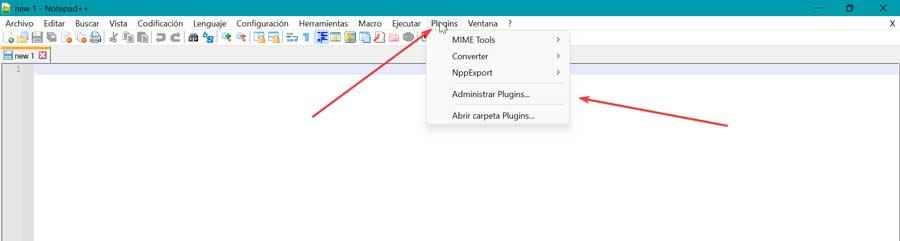
This will open a new window for us. In it we will see that a wide variety of these complements are included in the application itself, but without installing, with which to be able to increase the functions of this text editor. In this way, it will only be necessary to mark the plugins that we want to add to the program so that they are installed immediately and we can use them in the editor. Once marked, click on the Install button that we find in the upper right part of the window.

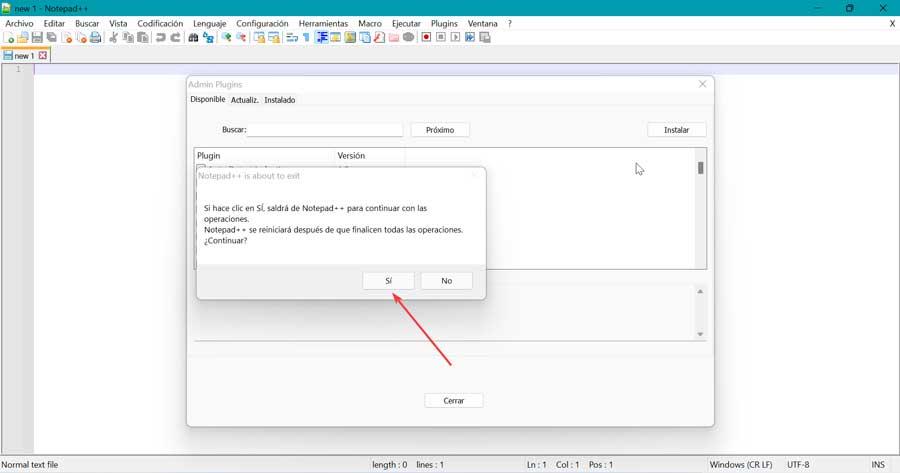
Finally, a warning appears indicating that the program will close and restart to complete the installation, so we click Yes. Once it restarts, we will see the plugin installed in the Plugins menu under the « Installed” and we can start using it.
Install a plugin manually
Alternatively, it is possible to install a plugin without using the plugin manager. For this it will be necessary that we have previously downloaded it from the Internet. If we don’t know where to download them from we can choose to visit the GitHub plugin repository for Notepad++ from where to view a list and download all kinds of plugins made by the community.
Most likely, it is a ZIP file, so we must extract its content. In the event that it has a 32 and 64 bit version, we must ensure that we download the one that corresponds to our system, otherwise it will not work. function.
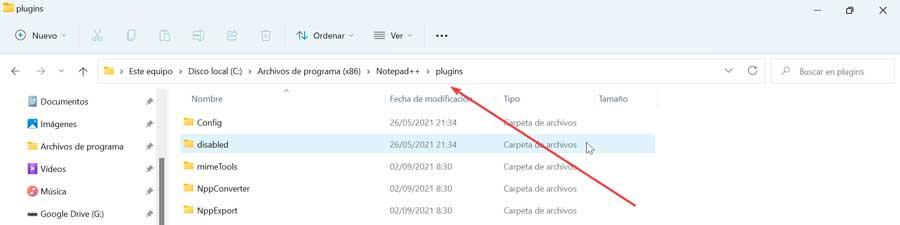
Later with the program closed, we must paste the decompressed file in the following location
“%LOCALAPPDATA%Notepad++plugins”
In the event that this path does not exist because we have not created it during the installation of the program, we will use the following path in the event that we have the 64-bit version:
C:/Archivos de programas/ NotePad++/ Plugins
If we have the 32-bit version, the address where we must paste it is:
C:/ Archivos de programas(x86) / Notepad++/ Plugins
Once this is done, we open the program again and the plugin should appear in the “Plugins” menu, in the “Plugin Manager” section. In this way, we have seen how we can install any complement for Notepad++ that we find on the internet, even if it is not in its official repository. Of course, it is important that we first make sure that it is safe and that we have obtained it from a reliable source.
Update plugins
Each add-on that we have included can receive updates periodically, in order to correct bugs, optimize its performance or add some improvements. As soon as there is a new update available, we will find it in the Updates tab within the Plugin Manager window. Here, we check the boxes of the add-ons that we want to obtain their new version and finally press the Update button.
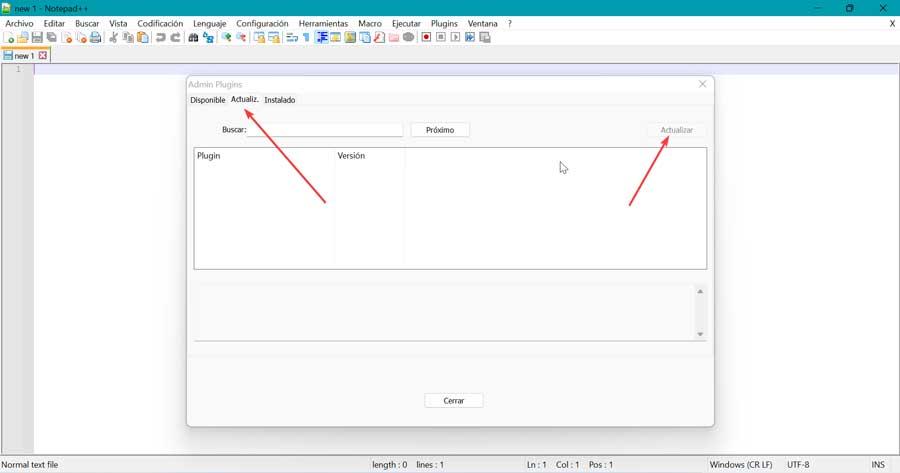
We confirm the operation and Notepad++ will restart installing the most recent version for that plugin.
On the other hand, the add-ons that we have installed manually will not be found in the Updates list. In order to update it, you will need to download the new version and replace your old DLL file with the new one. By performing this action, when we open the program again, the plugin will not appear again.
Remove plugins
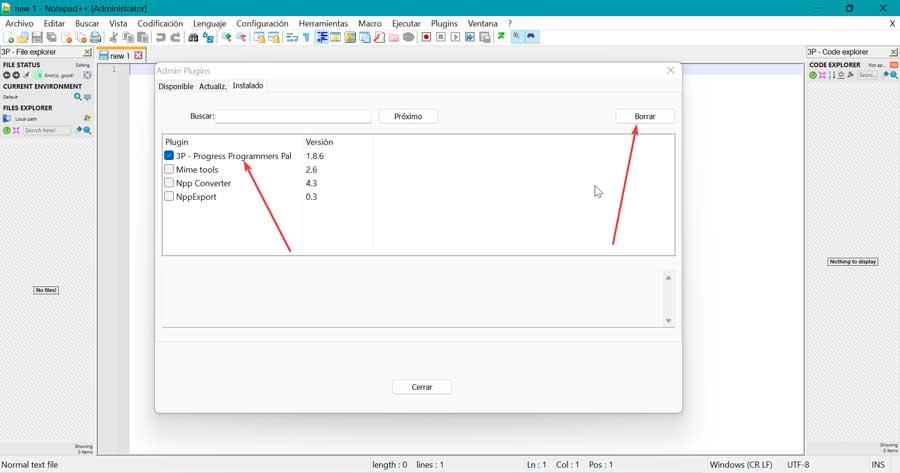
From the Notepad++ plugin manager itself we can uninstall those plugins that we have installed from it, since those that we have installed manually will also need to be removed in the same way. We can carry out this process without fear, because, even if we uninstall it, it does not prevent us from being able to install it again later, if we need it again, following the previous steps.
We open Notepad++ and click on the Plugins tab and then click on Manage Plugins. In the new window we click on the Installed tab. Here, we check the boxes corresponding to the plugins we want to remove, being possible to remove more than one at a time, just by checking them. Once this is done, click on the Delete button and the removed add-ons will be placed back in the Available tab, so that we can reinstall them at any other time.
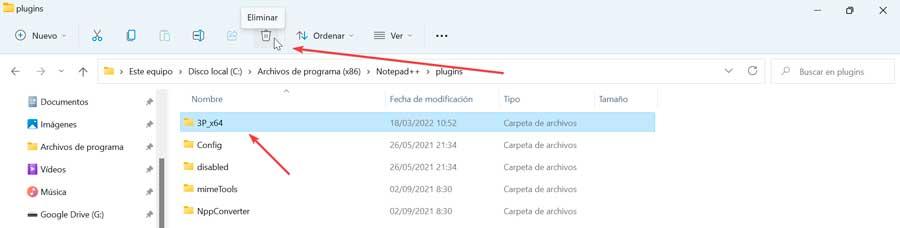
In the event that we have installed them manually, we must remove them in the same way. To do this, we open the File Explorer and go to the path where we have saved them. We select the folders of the plugins that you want to remove. In the event that there are several folders, we can use Shift and Ctrl to select several at the same time. Later, we press Delete or Shift + Delete to delete them permanently.