When our computer takes longer than usual to turn on, it is likely that we associate the problem with the latest update that was installed without us realizing it. However, if after turning on the computer, it continues to run slower than normal, repeatedly reads the hard drive, the problem is not the update, the problem is in the file system, a file system that, in the case of Windows it is NTFS and that, almost certainly, is corrupt.
In this case we contemplate two scenarios. If we don’t repair the computer quickly, it is likely that the boot partition will stop working completely and we will not be able to start the computer. If so, we can use a Live Linux distribution to start the computer and repair the boot.
But, if we catch the problem quickly, we can fix this problem directly from Windows without resorting to a Live Linux distribution. Regardless of what our situation is, in this article we are going to show you all the methods to solve this problem in both cases.
Why does a hard drive stop working?
Hard drives that include Windows as an operating system use the NTFS file system to offer a greater amount of storage, speed and be able to manage larger files than with the FAT32 and exFAT file systems, also used by Windows only to format drives. USB or external hard drives.
A file system is nothing more than the way the operating system uses to organize data. If the file system becomes corrupted the hard drive may start running much slower than usual allowing the computer to continue using it. In the worst case, the file system disappears and we have to recreate it trying to preserve the operating system.
Some of the main reasons why a hard drive may stop working are:
-
Bad hard drive. If the hard disk is damaged by continued use, over time, some sectors stop working. If those sectors contain or are part of the system partition, the computer will start to work slower than usual until, if we don’t repair it before, it will stop working completely.
-
Virus. A virus or any other type of malware that has crept into our computer may also have caused the problem, if its main mission was to damage the boot partitions of the computer to make the data inaccessible.
-
Problems during the installation of Windows. If during the installation, we have not correctly created a boot sector for the drive, something quite unlikely if we use the Windows installer, the computer will not find a partition with the boot system that allows it to load the operating system.
How to repair an NTFS hard drive from Windows
If our computer starts up, even if it does so erratically, we can solve this problem by following some of the different methods that we show you below.
From command line
The fastest and easiest method to repair a damaged or corrupt hard drive partition while it is accessible by the computer is to use the check disk (CHKDSK) command from the command line using CMD.
First of all, we access the Windows search box and write CMD selecting the first result that is displayed (Command Prompt). Next, we will use the following command which will scan the hard drive for errors, repair the NTFS partition on the computer and repair bad sectors.
chkdsk /f /r
If we want to repair an external hard drive connected to our computer, we must accompany that command with the drive letter. For example, if the hard drive with the damaged partition is located in drive d, we must use the command
chkdsk d: /f /r
If it is a RAW partition
A RAW partition in Windows means that the computer does not recognize the file structure of the partition, so it cannot access the drive to read data. This usually happens when the drive has been damaged or the file system is not recognized by the computer.
To be able to access that partition again, the first thing we must do is convert it to NTFS format without losing the data stored inside it. To do so, we will use Command Prompt and the Diskpart utility. From the command line we write the following commands:
diskpart
list disk To list the drives connected to the computer
select disk n Where n is the number of the unit we want to repair
Once we have identified the drive in RAW format, we must delete all partitions using the following command
clean
Next, we create a primary partition
create partition primary
Finally, we use the active command. If by carrying out this process, we have not been able to solve the problem, we will be forced to format the unit or use one of the different available applications that will help us to recover the data and change the format of the unit.
Repair Windows boot
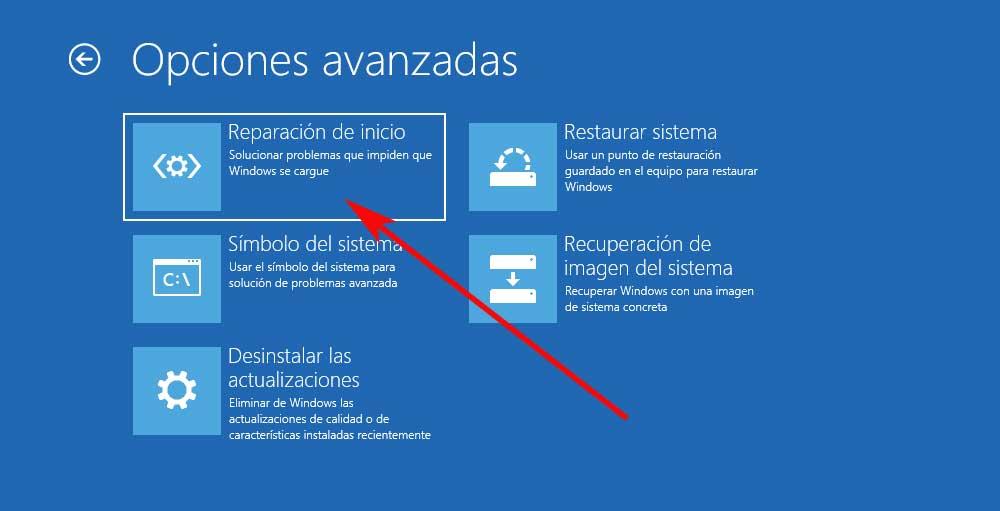
We can also use the Windows recovery options, an automatic recovery menu that is automatically displayed when the computer detects that the computer has been restarted for 3 consecutive times during the boot process without finishing the process.
In that window, click on Advanced Options, then click on Troubleshoot and Advanced Options. Within this menu, click on the Startup Repair option and wait for the process to finish.
Using these apps
If none of the solutions that we have shown you so far have worked, we can use applications created to solve this type of problem, such as the ones we show you below.
Mini Tool Partition Wizard
One of the most complete applications to recover Windows boot partitions and in other formats is Mini Tool Partition Wizard, an application that also allows us to recover data from drives that are not accessible.
This application is available for download completely free of charge, it is compatible from Windows 7 and it works without any problem in Windows 11. We can download this application directly from its website by clicking on the following link.
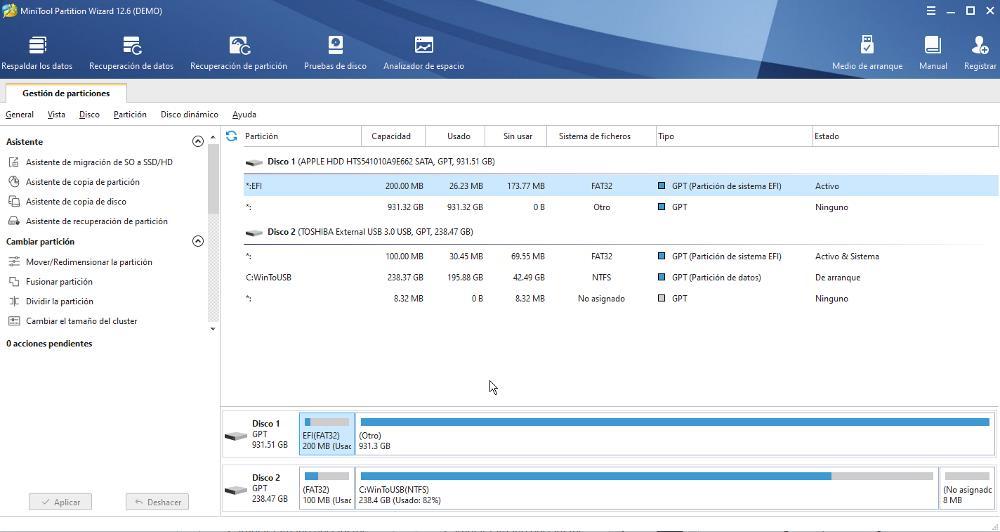
We also have a Pro version at our disposal for many more, functions that we can try completely free of charge for 7 days, so there is no need to pay for the application to repair our hard drive if it doesn’t take more than 7 days to do so.
Data Recovery Software
With this very descriptive name, we find a powerful application available for Windows and Linux that allows us to restore FAT, NTFS and HFS file partitions. In addition, it also includes a powerful tool that allows us to recover a large number of types of files that have been deleted due to losing a partition.
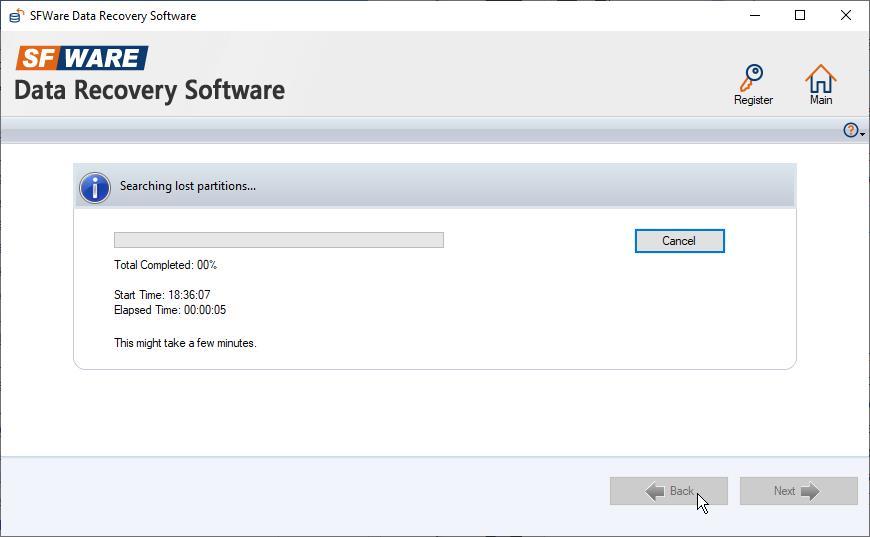
This application is compatible from Windows XP onwards, although the older versions of the application for such old operating systems lack the functions that allow us to recover data in both Windows 10 and Windows 11. We can download a version of the application and if we see that it works correctly, we can buy the paid version with all the functions unlocked for 69 dollars.
Repair an NTFS drive from Linux
The file system in Linux is ext4, at least or in most of the newer Linux distros. However, unlike Windows, which is not capable of reading drives in this format, nor in previous versions (ext2 and ext3), Linux is capable of reading drives with the Windows NTFS file system. Thanks to this compatibility, we can use Linux to repair a corrupt NTFS partition.
If, in addition to Windows, we have a partition with a Linux distribution installed on the computer, we just have to start it and access the terminal. But, if not, we can create a Linux installation disk on a USB, to load Linux on the memory booting from the USB that allows us to execute the commands that we are going to need to repair the NTFS partition.
If we do not have a Linux distribution installed on our computer, the first thing we should do is download one. From Softzone, we recommend using Ubuntu, because it is one of the distros that offers the greatest support and because it is one of the most complete distros that we can find today. To download the latest version of Ubuntu in its LTS version (with support for several years), we access the following link and download the ISO image by clicking on the Download button.
Next, we download the application Rufus to create a bootable drive of the version of Ubuntu that we have downloaded. To create an installation USB, we need a USB drive with a minimum capacity of 8 GB, a drive that will be formatted to install the Ubuntu ISO, so all the content stored inside it will be lost.
Once we start Rufus, in Device we select the USB drive that we are going to use. In Boot Choice, we select Disk or ISO image and click on Select to select (forgive the redundancy) the Ubuntu ISO image that we have downloaded. The rest of the options we leave as they are. To start the process, click Start.
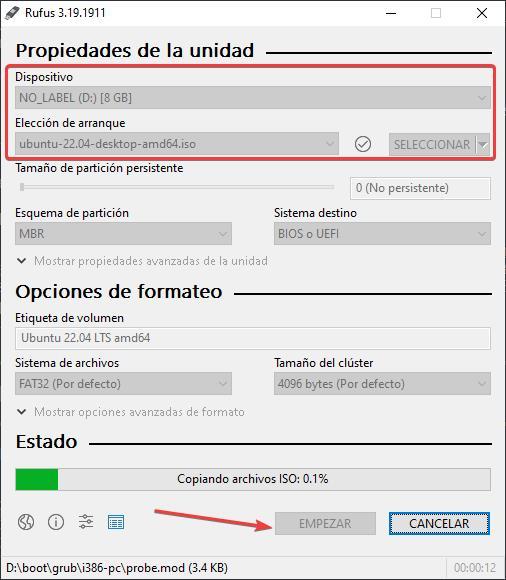
Once the process is finished, we connect the USB drive to the computer where we want to repair the drive with NTFS format, we access the BIOS and modify the system to use the USB that we have connected as a boot drive.
In the boot menu that shows the equipment, we select, from the 4 options that are shown, Try or Install Ubuntu and wait for it to load into memory. Once the Ubuntu graphical interface has loaded, select Spanish in the left column and then click Try Ubuntu.
Once the graphical interface of the Linux distro that we have installed has loaded, click on the last icon in the options sidebar and select Terminal.
The first thing to do next is to identify the hard drive with the NTFS file system that we want to repair. If we only have one hard drive without any partitions, the drive will be sda followed by a number. To make sure we use the following command to show all the units.
sudo fdisk -l
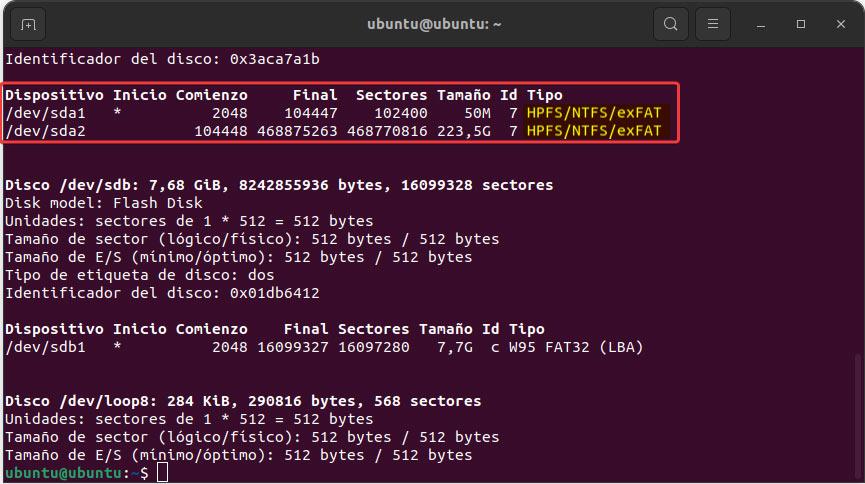
Once we have identified the drive we want to repair, we install the ntfs-3g packages to repair the hard drive with the NTFS file system, using the following command
sudo apt-get install ntfs-3g
To repair Windows NTFS drive, we will use the following command
sudo ntfsfix /dev/sda1

If the drive to repair is sda2 or sdb1, we must use this name on the top line instead of sda1.


