Depending on the number of emails we receive and the time we can dedicate to it, it is likely that it will become more and more difficult for us to open Gmail. The first thing we must do, before starting to answer emails, is to organize and classify them, in order to leave only the emails that really deserve our attention. Gmail includes a function that allows us to organize emails as they arrive in the inbox.
Gmail allows us to organize emails depending on whether they are advertising, subscriptions, social networks and others, however, it is not the best option, since, in the end, we will always find ourselves in the need to mark them as read and move them to the corresponding folder unless we delete them directly.
Automatically organize your Gmail inbox
Gmail, like other email platforms, allows us to create filters to organize emails into folders (labels). In this way, we can access the corresponding label when we want to find all the emails from the same person or domain without having to search and not find the email we are looking for.
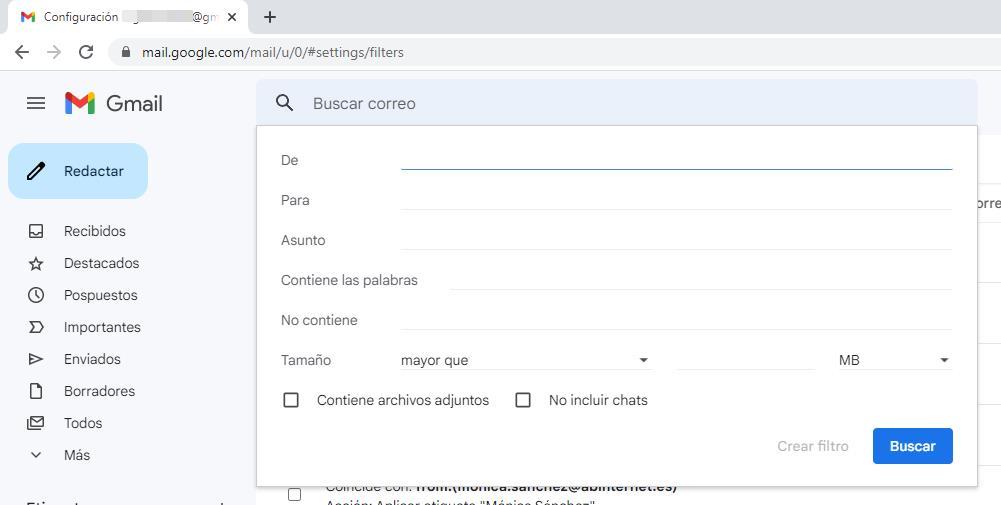
The Gmail option that allows us to create filters and automate the task of classifying the emails we receive in Gmail is found within the Gmail settings, which we can access by clicking on the gear wheel and then clicking on See all settings. Next, we go to the Filters and blocked addresses tab and at the bottom, click on Create a filter.

Next, we need to set the rules that will be applied in order for the filter to be applied correctly. If we want to create a filter for all emails from the @softzone.es domain, instead of creating a rule for each email account, we can use the asterisk
that will represent all the email accounts of that domain. In this specific case it would be: *@softone.es.

Create Gmail Filters
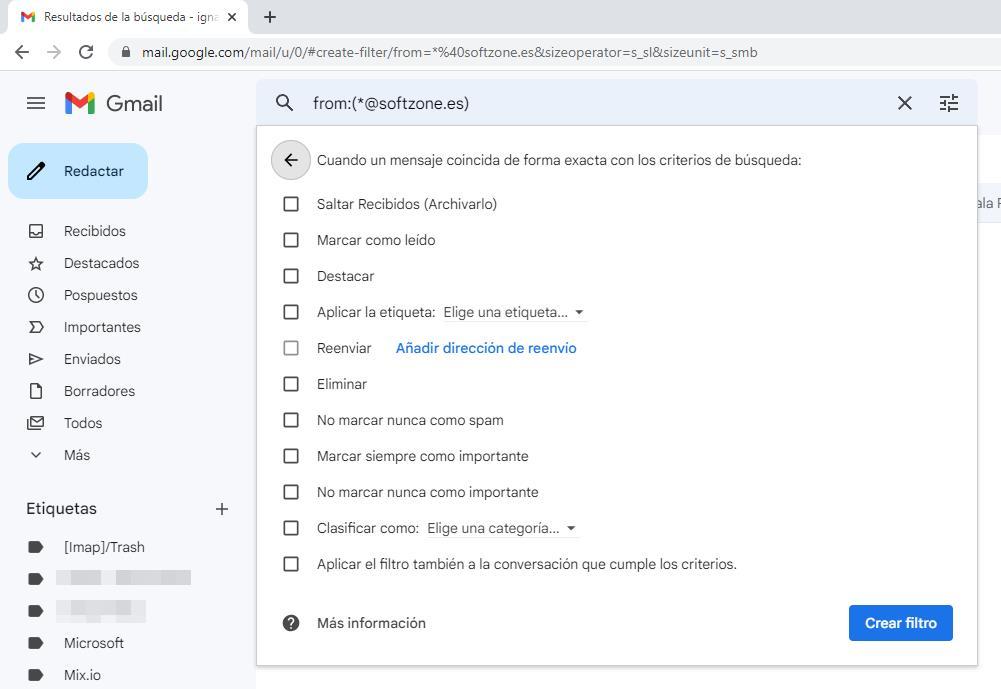
In the next window, we must establish what we want to do with the mail: mark it as read, add a label, classify it within a category, delete it directly, forward it to an email account, highlight it, file it directly, among others. It is important to check the box Apply the filter also to the conversion that meets the criteria, since, in this way, all the emails that we have previously received in our account will be ordered and categorized in the same way.
If we want to create a label to store all those emails, it is not necessary to go back to our steps to the Gmail configuration options, we just have to click on Choose a label and select the New label option. Finally, click on Create filter to apply the rule that we have established. We can create as many rules as we want.


