Map animations for your travel videos
If you – like us – have been busy sorting through your old holiday photos lately, you might be looking for a way to present them in a fun way. If you have made a tour, it is very nice to show on the map which route you have taken and which sights you have seen along the way. This is very easy with iMovie on the Mac, because you have map backgrounds at your disposal. It is not possible with iMovie on iPhone and iPad.
Animated maps in iMovie
You can show photos and videos of the places you have been on a map animation. This is especially nice on a road trip or honeymoon. You show an animation on the map at each stage of the journey, moving from A to B. You then show the sights that could be seen at that location, and then travel to the next location on the map with an animation.
That is how it works:
- Make sure you have iMovie installed on your Mac, or install it from the Mac App Store.
- Create a new project by pressing the plus sign.
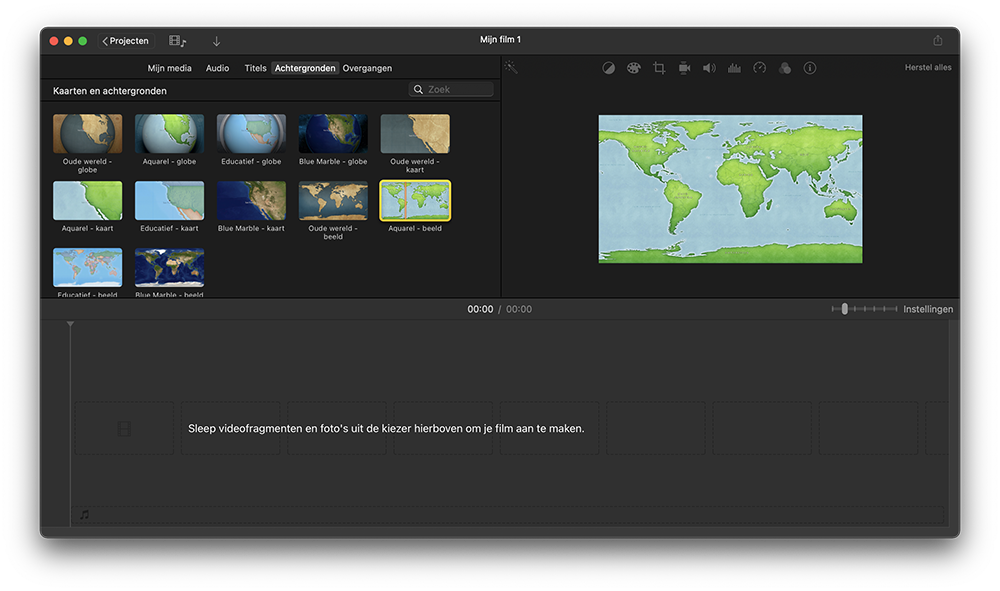
- Go to Backgrounds at the top of the browser.
- You will see a series of maps and globes. Move your cursor over the cards to see a preview.
- Double-click the card you want to use or drag it to your timeline.
Show route animation in iMovie
The nice thing is that you can make an animation of the route. The first thing you do is create the different stages. If you have traveled from Groningen to Madrid, you can show this on the map.
- Double-click on the desired card in your timeline.
- At the top right you will see the option to enter two place names under Route.
- Click on the arrow to view the animation.
- Satisfied? Then add more stages.
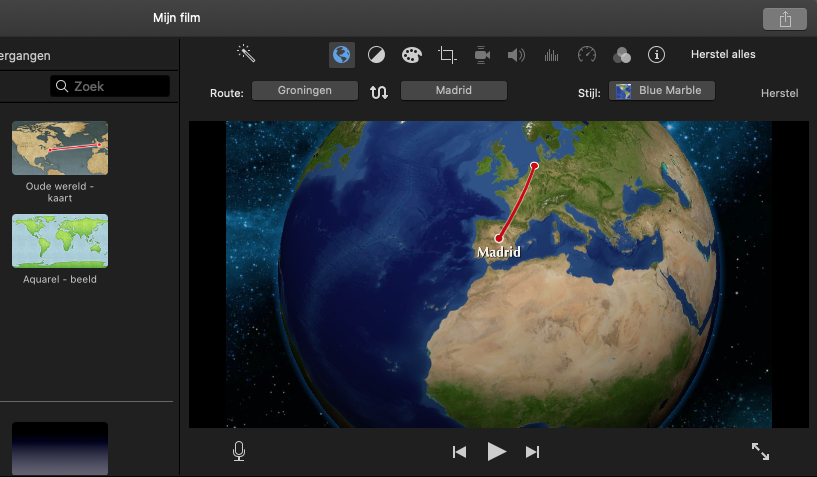
You can reverse the route with the button between the two place names. You can also use the icons at the top of the screen to adjust the shades of the map and other properties. With Style you can choose a different type of card and with Duration you can set how long the animation lasts.
Add photos and videos
Of course you’re not there yet, because you also want to add your favorite holiday photos per destination. Drag them into the timeline after the relevant animation. With Ken Burns effects you can give photos a dynamic look and with Transitions you ensure that the photos do not appear abruptly on screen. The Turn outwards transition is suitable for holiday photos, for example.
You can complete your video with background music, titles and whatever else you like.
More tips about iMovie
We have more tips about iMovie for you:
- This is how you use royalty-free music in iMovie
- iMovie on iPhone and iPad: create and edit videos yourself
- Download iWork, Garageband and iMovie for free on iOS and Mac: for whom and how?


