When Microsoft announced Windows 11, the company also announced an increase in the requirements necessary to install it, leaving millions of users in a situation of planned obsolescence, without the possibility of updating their PCs. From the first day that this operating system reached the Options began to appear on the market to install the operating system even without meeting the requirements.
The truth is that increasing the requirements to install Windows 11 does not make much sense. It is true that the increase in RAM could be explained, as could the increase in hard drive space or the need for a 64-bit processor. But forcing users to have a TPM 2.0 chip in the PC does not make any sense. And this has taken its toll on Microsoft, since it has only managed to hinder the growth of the OS and ensure that, in 2 years, its market share remains less than 25%.
Windows 11 checks the system requirements several times. For example, when we start the installation from boot, when we use the installer to upgrade from Windows 10 to Windows 11 or when we are going to install new versions of Windows 11 itself. In the first case, what we must do is create a media patched installation so that we can install the operating system on PCs that do not meet the requirements. And this is done using tools like Ventoy or Rufus.
But if what we are going to do is upgrade from Windows 10 to Windows 11, or install a new version of the operating system itself and our PC does not meet the requirements, skipping the check has never been so simple. Simply mount the Windows 11 ISO on our PC and, instead of running the typical “setup.exe” by hand, what we must do is run it, with a parameter, from CMD.
Install Windows 11 or update without meeting requirements
To do this, we open a CMD window, and we place ourselves on the CD drive which, assuming it is the letter “D”, the command will be: “cd d:”. If the Windows 11 installation drive letter is different, we need to change the letter in the above command. And, once located on the unit, the magic command that we must execute is the following:
setup /product server
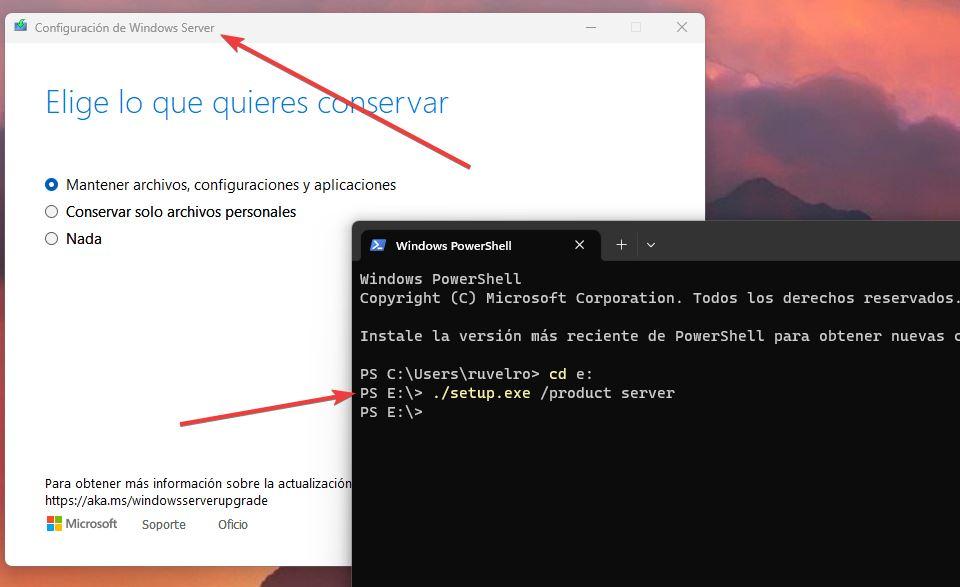
If you open it from PowerShell (the recommended option), the command would be the following:
./setup.exe /product server

When you press Enter, we will see that the wizard to install Windows 11 begins, but this wizard appears marked as “Windows Server Setup” in the top bar of the window. What we must do is follow it to the end to be able to install the system on the computer, seeing how it never performs hardware checks or shows us any errors.
The process will be the same if we have already installed Windows 11 but we have problems when installing new versions of it from Windows Update. Simply download the updated ISO image with the latest patches, and use that command to install the update and bring our operating system up to date.


