Scan documents in the Notes app
The Notes app contains many useful features. In addition to making notes, lists and tables and using graph paper, you can also scan documents. You no longer need a separate scanner app to quickly scan that paper document. In this tip we explain how the scanner function in the Notes app works.
- New since iOS 17 and iPadOS 17: take notes immediately
- Scan
- To process
- To secure
- To share
- Search words
New from iOS 17 and iPadOS 17: annotate scanned documents
From iOS 17 and iPadOs 17, more is possible with PDFs, including scanned documents. Once you scan a document, you can immediately edit and annotate it. This is especially useful if you have scanned a form. It is also useful if, for example, you want to shade parts of the scanned document or write changes by hand, without modifying the original physical document. For example, on the iPad you can use the Apple Pencil for this, but on the iPhone you simply use your finger. If you have scanned a document in a note that you share with someone, you can also work on the scanned document (as a PDF file) together. This way you can both see each other’s changes live.
But there is even more new. For example, scanned documents are shown larger in a note. Instead of a smaller thumbnail, you can immediately view the entire document in the note. You can then start writing immediately. And if you’ve scanned a form, you can also use the autofill feature to enter data from the Contact app.
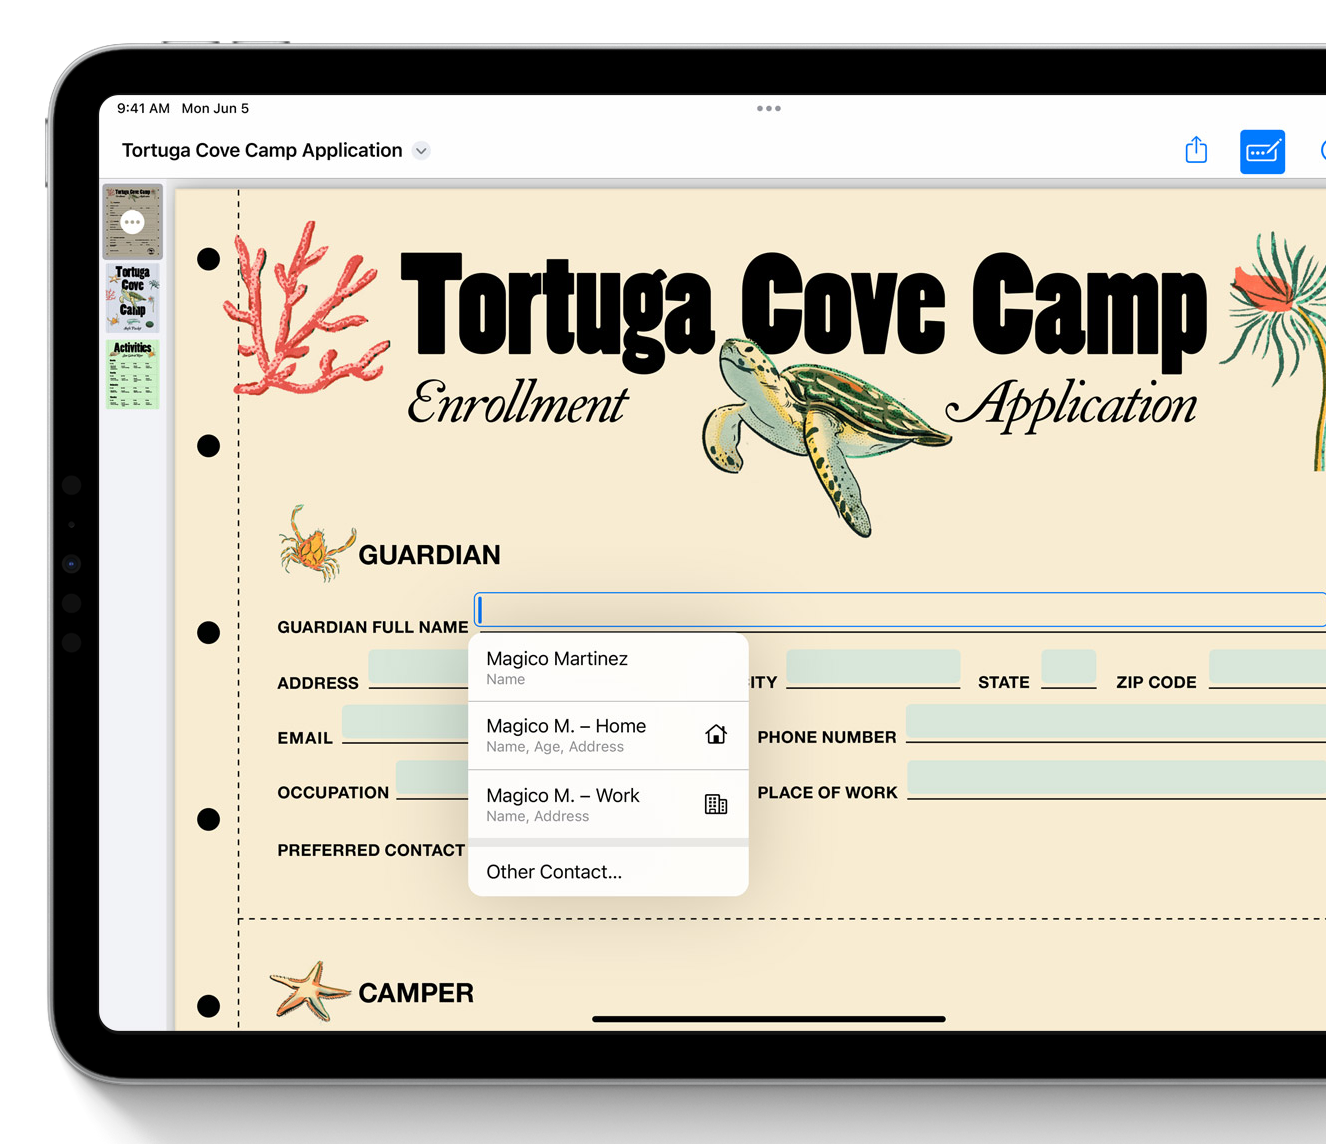
These new features (automatically fill in a PDF and instantly browse a PDF) are also available from macOS Sonoma.
This is how you can scan a document in Notes
There are already many scanner apps available for the iPhone and iPad, but since iOS 11 you can do this by default from the Notes app. This allows you to easily digitize paper documents. The Notes app automatically recognizes a document and can also crop it manually.
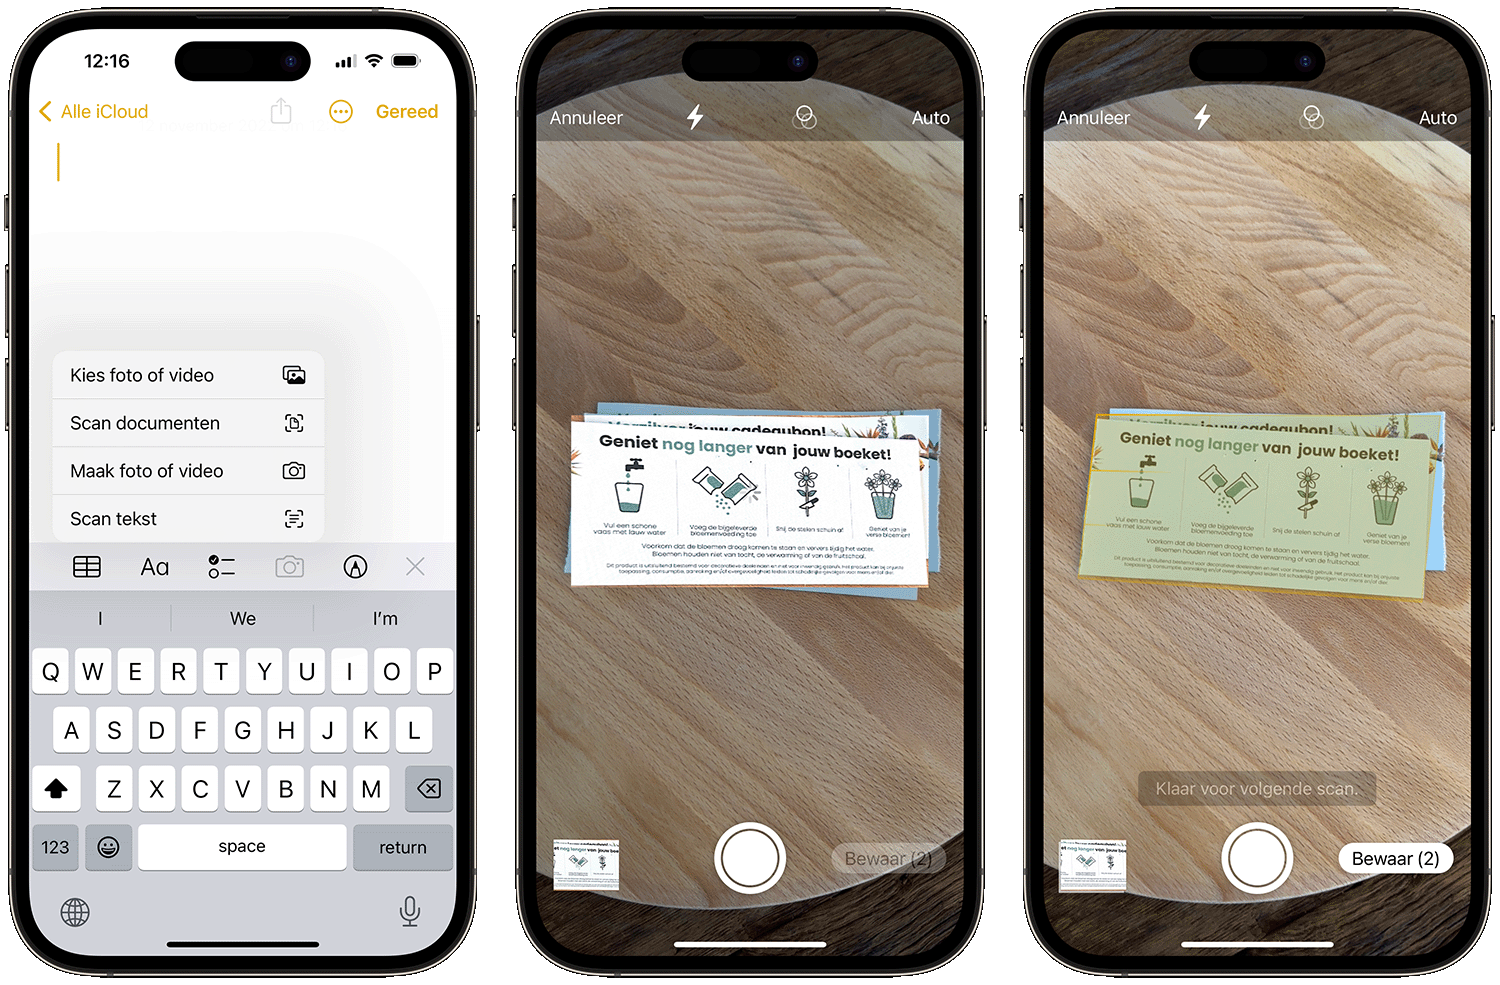
If you prefer to do everything on the iPhone, with the scans ending up in the Notes app, follow the steps below;
- Open the Notes app and create a new note.
- Tap the camera icon and choose Scan documents to optimize the photo for text recognition. You can also insert a regular photo.
- Make sure the document is on a quiet surface. The document is then automatically recognized and the camera makes a scan.
- Success? Then you can immediately continue with the next scan.
- The scans appear at the bottom left. Press Done when you’re done.
Edit scanned document in the Notes app
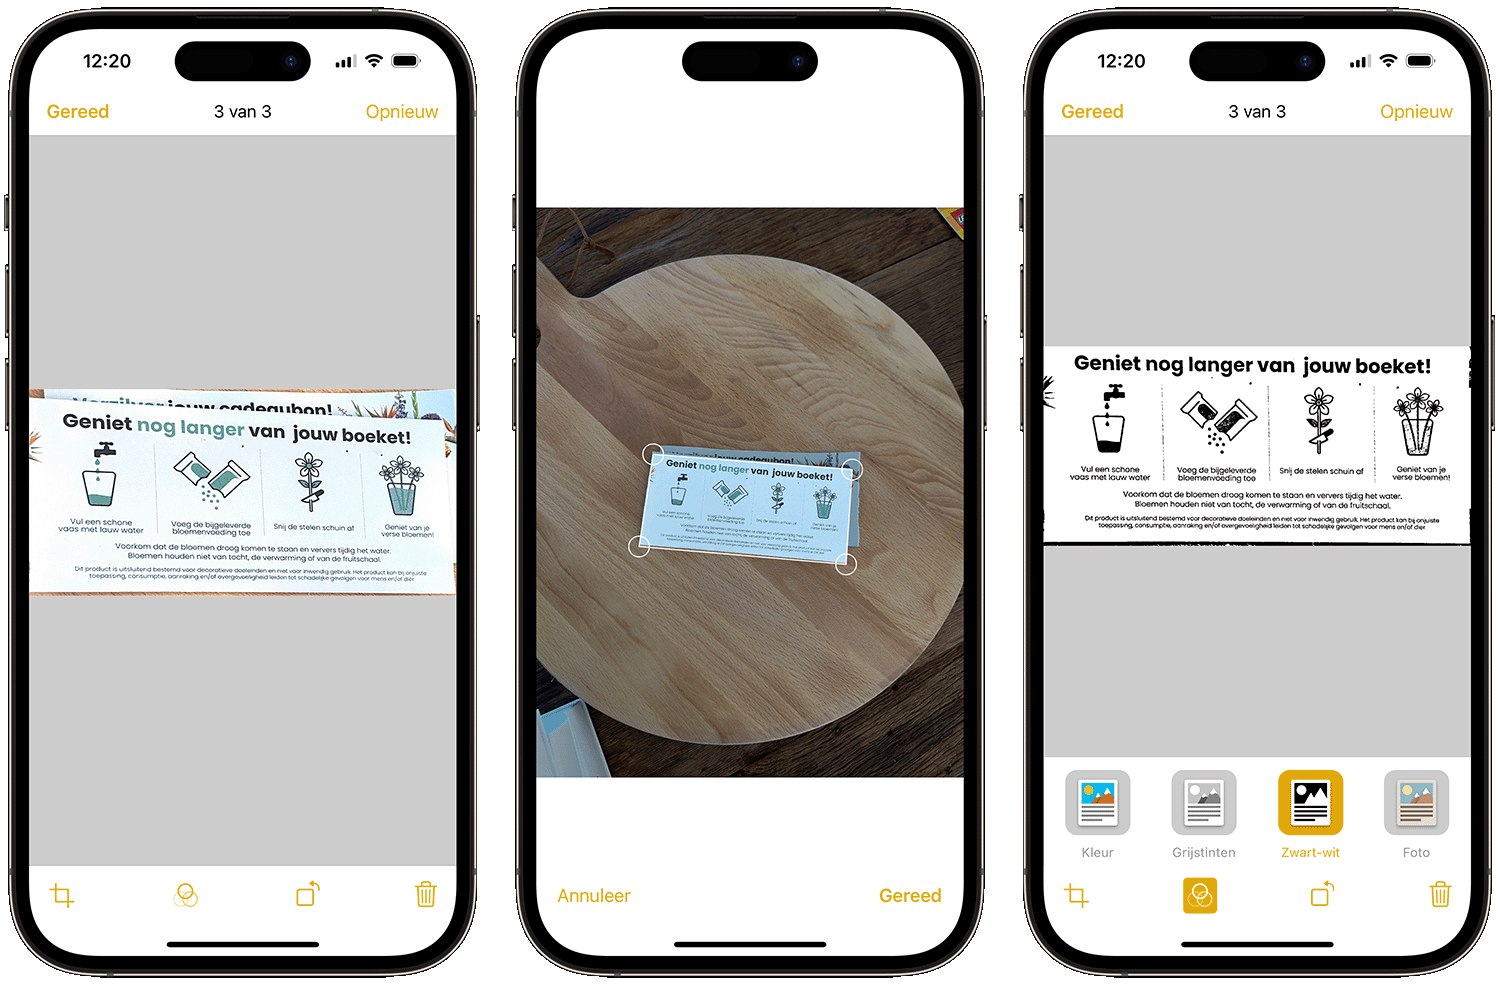
You can further optimize the scanned document for better readability. By default, the scan is already optimized for text recognition and straightened when it is created. As you can see in the image, the scan is cropped somewhat sloppily. Tap the scan if it’s already in a note, or edit the scan right after taking the photo.
- Open a note with scanned documents.
- Tap the image. You can now crop the scanned document as shown in the photo. The photo is made very spacious, so that you have plenty of options to place the corner points properly.
- You can also provide the scan with a filter. In this case, no color document is needed, so we choose black and white for better readability.
- Then choose Done to save your edits.
Security of scanned documents
Please note that notes with a video, audio, PDF, or file attachment cannot be locked. So do not scan your credit card or receipts for ‘secret’ purchases if others also have access to your iPhone or iPad. In that case, it is better to choose an app for scanning documents that has PIN code protection.
Scan into Share Notes
If you want to share a scan you have made in the Notes app via iMessage, Mail, AirDrop or other ways, you can:
- Open the note in which the scans are saved.
- Tap the scanned document in the note.
- Tap the share icon at the top right.
- Choose a method to send the scan. By default it is created as a PDF.
- Send the scan in the desired manner.
The document scanner is especially useful if you want to supplement a note with a written file, for example a sheet of notes from a lecture or a meeting. This way you can easily digitize the notes and put them in a note and share them with others if necessary.
Search scanned documents
After scanning documents, you can search for specific words, thanks to optical character recognition (OCR) support in iOS 13 and later. You can read how this works in our tip about searching scanned documents.
If you want more options, you will find many more options in our list of document scanners for the iPhone.
You also have the option to turn your iPhone and Mac into a document scanner. You then take the photo with your iPhone and it is automatically forwarded to an app or folder on the Mac.


