Simply by connecting to the Internet and opening a website, there are many points where they can filter all of our traffic. For example, when we write the URL of a website in our browser, it is sent unencrypted and without any type of security directly to the DNS server, where it is resolved and returned to our computer to know which server we should connect to. And, thus, anyone can know our DNS requests to know which websites we visit. Or worse yet, impersonate them.
Little by little we are migrating towards increasingly secure and encrypted point-to-point connections. In this way we prevent not only that anyone can capture the network traffic we generate, but also that they can impersonate it and give rise to different scams. However, by its very nature, DNS remains one of the most basic protocols and, in general, does not have any type of encryption.
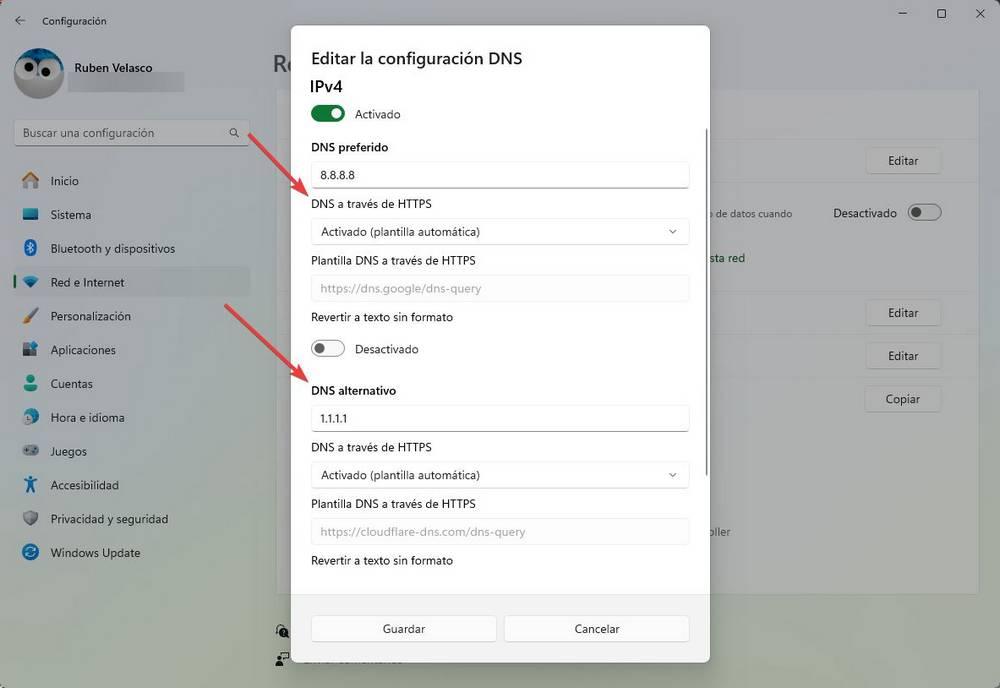
Most name providers, DNS, offer the possibility of making queries through a secure DNS, DoH, so that they travel encrypted just like an HTTPS request. Windows 10 and Windows 11 allow the use of this alternative, called “Secure DNS”, although we have to configure it by hand, and it is somewhat complicated if we do not have advanced networking experience.

Luckily, Google is always there to help us stay as safe as possible on the Internet. And, for DNS, it has its own option that allows us to protect them by simply checking a button.
This is how Google Chrome’s secure DNS works
Google Chrome has a function within the browser itself that allows us to configure a secure DNS so that all the requests we make are made through it. In this way we prevent requests to the server from traveling unencrypted and ending up being exposed. The best of all is that we can activate it in a way as simple as the one we show you below.
The first thing we will do, with an updated Google Chrome, is enter the browser configuration section. Specifically, within the security and privacy section. We can reach it directly through the following URI:
chrome://settings/security
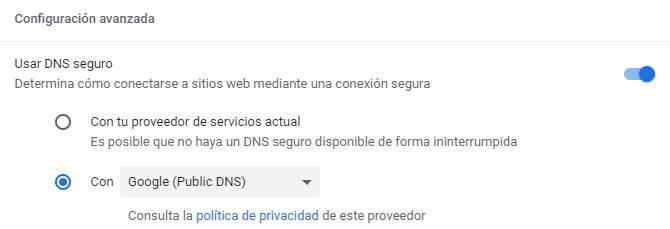
Once there, we can find several options related to browser security. Specifically, the one that interests us is “Use secure DNS.” What this function allows us to do is, instead of sending all DNS traffic (the web addresses we visit) in plain text, unencrypted, to the server configured in Windows, it allows us to apply an additional layer of protection.

If we have manually configured this server on our computer, then there is no problem, since Google Chrome itself will use it by default. But, if we have not done it, or we do not know, we can change it from the second option. Expanding the panel we can see several domain name server options with a secure connection:
- CloudFlare
- OpenDNS
- CleanBrowsing
Our recommendation is that we use any of the first two. But, yes, let’s use one of them to prevent all these requests, which can be hundreds a day, from ending up in danger.


