Not HEIC but JPEG
Since iOS 11, the iPhone’s camera has been set to the HEIF / HEIC format by default. This uses less storage space, without loss of image quality. This way you can store more photos on your iPhone and in iCloud, while still having razor-sharp photos. The iPhone is automatically set to the HEIC format, but not everyone wants this. Would you rather continue photographing in JPEG format? Which can! You can easily indicate in the settings that you want to use JPEG instead of HEIC. This is only possible on the iPhone 7 and newer, because only those devices support HEIC. Previous iPhones can only take photos in JPEG format.
- Set up
- Difference JPEG and HEIC / HEIF
- Transfer to computer
The terms HEIC and HEIF are sometimes used interchangeably. HEIF stands for high-efficiency image file format, while Apple usually uses the term HEIC (high-efficiency image container). The files can therefore be recognized by the extension .HEIC. In addition to individual images, a container format can also store image sequences, for example for bursts, live photos and photo series with different focus points or exposures.
Shooting in JPEG format on iPhone
HEIC has all kinds of advantages. The photos are of the same quality, but they only take up half the storage. This means that your iCloud storage will fill up less quickly, it will cost less data to send and synchronization with your Mac will be faster. When exporting a photo, the correct format is automatically selected. So if you share a photo with an unsupported device (via cable or AirDrop, for example), the photo will automatically be converted to JPEG.
But sometimes you might still want to use JPEG. For example, if HEIC files often cause problems when you exchange them with others. Also, the HEIC format is not always suitable for certain photo editors.
You do this as follows:
- Open the Settings app on your iPhone.
- Tap Camera > Trees or File Trees, depending on the iOS version.
- Choose the Most Compatible option.
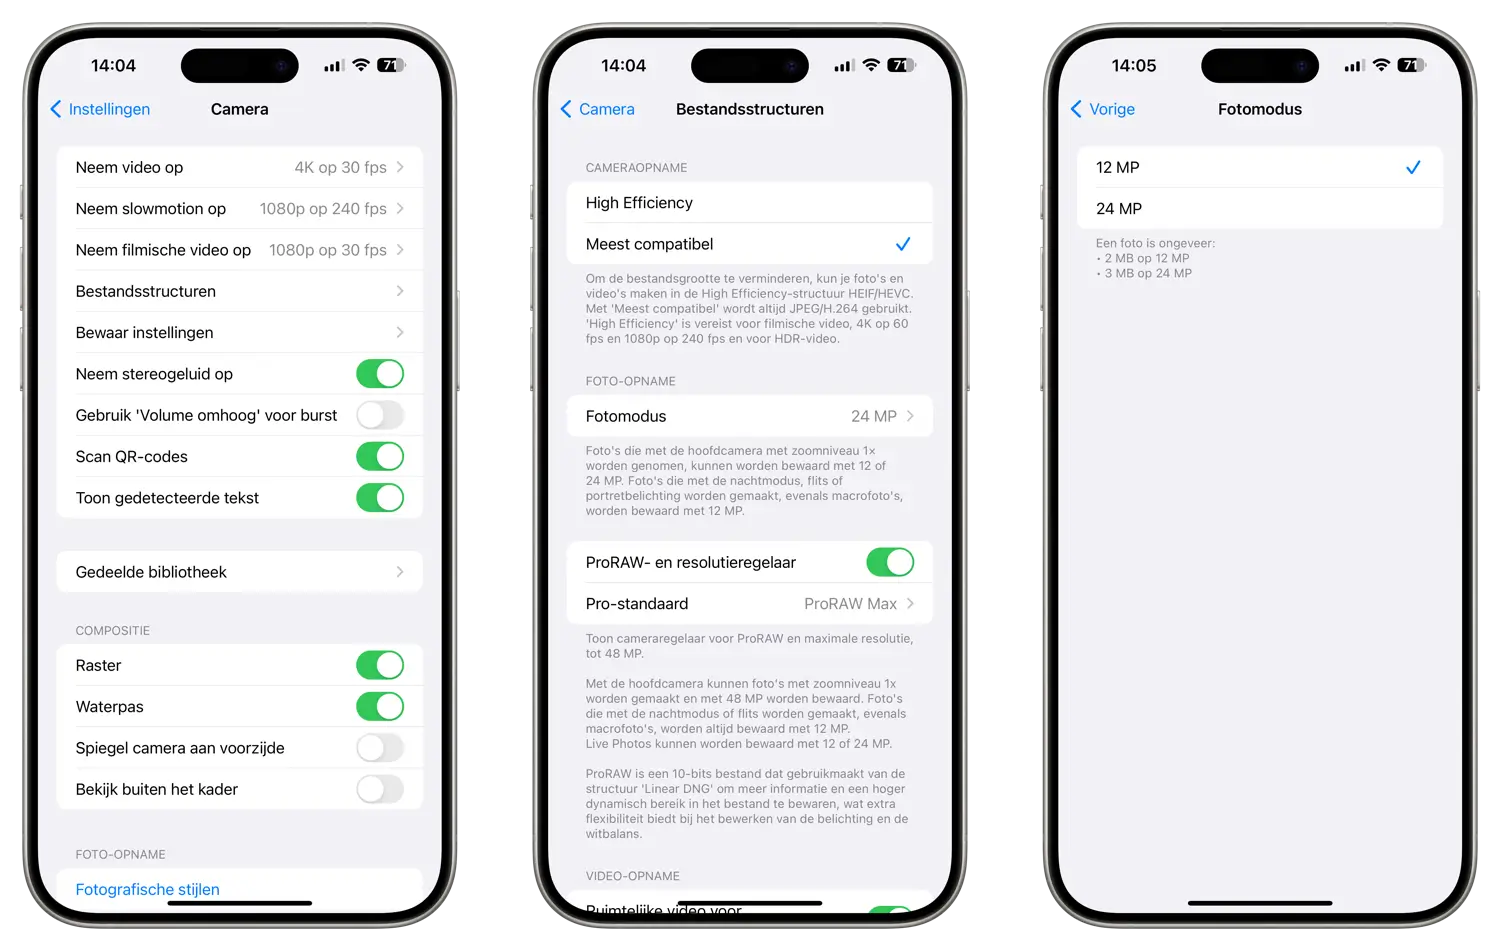
The Camera app will now no longer take photos in HEIC format or save videos in HEVC format. Instead, more common formats will be chosen that you can easily exchange.
Tip! Do you have an iPhone 14 or newer and do you want the photos to take up less space? Then select 12 MP (or 12 megapixels) under Photo mode. This prevents much larger 24 megapixel photos from being taken.
Difference JPEG and HEIC on iPhone
Due to the enormous space savings of HEIC, it is advisable to choose this format. You don’t have to worry about compatibility issues when you collaborate with others, because as soon as you send photos via the sharing menu (e.g. via email, cable or AirDrop), the device will automatically convert the photo to a suitable format. HEIC files are also automatically converted to JPEG if you open them in an app that hasn’t yet been adapted for the new format. Apple already arranges everything for you.
Convert existing photos to JPEG
If you have already taken photos with the camera that were taken in HEIC format, you can ensure that they are always converted to JPEG when transferring them to a computer. You do this as follows:
- Open the Settings app on your iPhone.
- Go to the Photos menu and make sure the Automatic option under the Transfer to Mac or PC heading is checked.
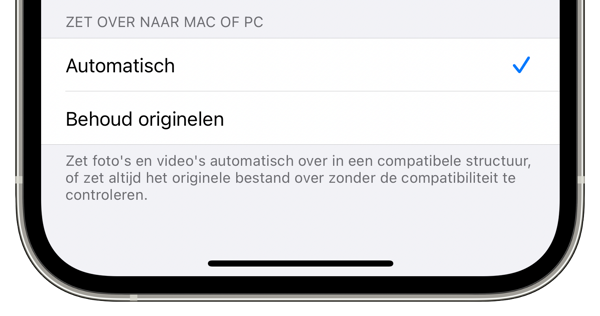
The latter ensures that photos in HEIC format are converted to JPEG if necessary, when you download them via USB to your Mac or PC. As indicated above, your photos are also automatically converted when you send them with others via AirDrop or the share menu.
Nowadays, Apple also offers a RAW format directly from the Camera app. This is called Apple ProRAW and is available on the iPhone 12 Pro (Max). You can find more information about this in our separate article.


