Making an explanatory diagram or brochure could be a bit complicated for some people, and even more so when the indicated tools are not used. However, Google has developed a way to be able to create flyers or brochures very easily using Google Docs.
In fact, the tool offered by Google is so efficient and powerful that it allows you to create brochures based on pre-designed templates, make them from scratch and even separate the sheets in a document, making it a good option for inexperienced people with a certain level of knowledge. of knowledge.
Create a brochure with Google Docs using a template
If you want to create a flyer from a template, the first thing you need to do is open Google Docs and sign in with your email and password.
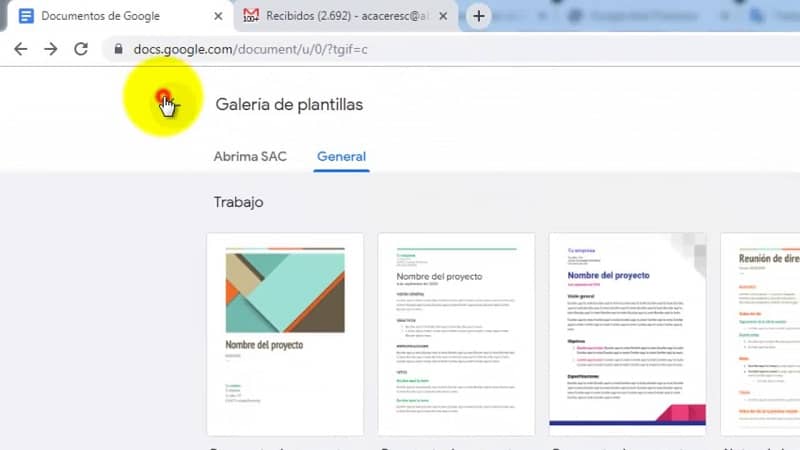
Later you must go to the Template Gallery section located in the upper right corner. In case you do not see the templates, you can click on the option with the three horizontal bars and select the configuration option and then check the Show templates on the home page box.
In this way you will be able to see the models that exist and choose the one of your preference. It should be noted that all the templates come in a vertical format, so if you want to create a triptych, for example, you will have to configure the options.
After this step, you will have to scroll to the end where you will find the “Work” section. You can find this title right in the middle of the “Template Gallery” page.
The next thing will be to select a brochure template. To do this, you must click on the Brochure option. Once the brochure is selected, you must replace the predefined text with the content you want it to have. In the same way you will have to change the predefined images that the brochure brings for those that you consider.
It is not necessary to change the brochure format to change the image. What you should do is select the image you are going to replace, right-click on it and select the replace image option. Finally you will have to select the option to upload from my computer, choose the image and click on open.
If you wish, you can also change the format of the text, where you can enlarge or reduce the size of the letter, change its color and even use another type of font. Not to mention that you can make the text bold or italic.
In this way you will already have a perfect brochure to distribute. You just have to save it and then print it. You can print it with the shortcut Ctrl + P or simply go to file and select the print option.
Design a brochure manually
Define if it will be a triptych or different pages. When you have decided, go to Docs and log in. If you have already made brochures you will see the previous documents, otherwise you can create one by clicking on the “+” button located in the upper left corner of the page.
You can rename the document as you like and then click on the File option and select page setup. There you can configure aspects such as the size of the sheet, the orientation and the margins. Change the margins to “0.64” on the right side of the window and hit OK.
This will save and apply the changes to the document. Then we will have to click on insert and select “Table” and you must select the number of boxes that will represent the columns that your brochure will have.
If you want you can add a second page with the shortcut Ctrl + A and then Ctrl + C to paste it. You can then press enter until a second page is created and paste the table by pressing Ctrl + V.
Then you can eliminate the borders of the table so that they serve as a reference when making the brochure but that they are not seen when it is printed. To remove the lines from the table you must follow these steps:
First, right-click on a line and select the table properties option, click on the black box located below the table border, then click on the white box in the upper right corner of the menu and press accept. You can also create brochures with Publisher if through Google Docs it has not met all your expectations.


