If Finder stops responding
Finder stuck? You can do this
If Finder is frozen or unresponsive, that doesn’t mean you’ll lose files. However, if you were in the middle of a file transfer process, we recommend not to force close too quickly. There may have been a temporary hiccup and it may resolve itself. Below you’ll discover what to do if the Finder stops responding.
- #1 Restart Finder
- #2 Activity monitor
- #3 Log in again
- #4 Enter terminal command
#1 Restart Finder
The easiest way to restart a frozen Finder is with a simple key combination. So:
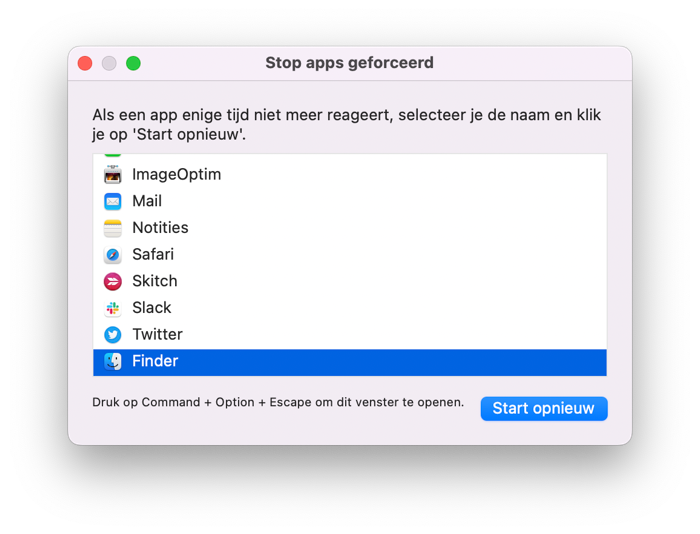
- In the menu, go to > Force stop or press
Option + Command + Escapeto show all running apps. - Select Finder and click Restart.

Because Finder must always be running, you can’t close it permanently. So it will be restarted immediately. With other software, the Force Quit button appears.
#2 Force Quit Finder with Activity Monitor
This method of restarting Finder takes a little more effort than the steps above, but it works.
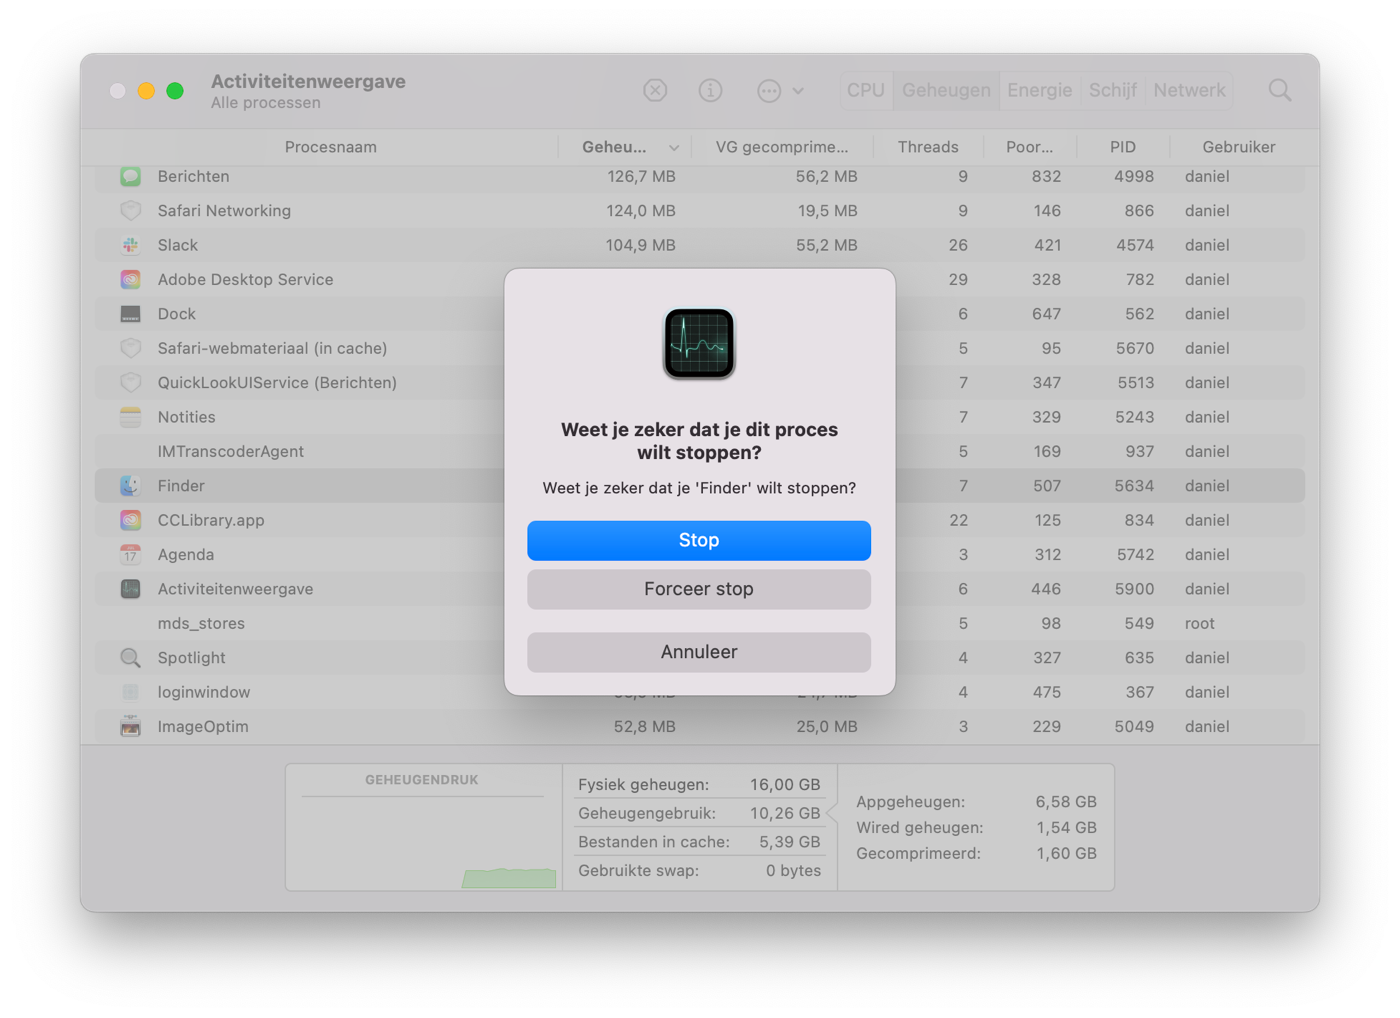
- Open Activity Monitor (for example via Spotlight).
- Find and select Finder from the list of all running processes.
- Click on the cross in the taskbar.
- Confirm that you want to force Finder to quit.

#3 Log out and log in again
Do the above methods not work? Then try logging out and then logging in again. To be on the safe side, if you’re reading this tip on the Mac where Finder has crashed, make sure you can find this tip when you’re logged out. For example, use a different device for this.
- Click on the menu at the top left.
- Then click on Log [gebruiker] out.
- Log in again with your password or Touch ID, if necessary.
#4 Remove corrupt Finder file with Terminal
Does nothing above work? Then there may be a corrupt file. With Terminal you can get rid of these without having to use Finder. Only do this if you have tried the options above.
- Open Terminal (for example via Spotlight).
- Enter the command below:
sudo rm ~/Library/Preferences/com.apple.finder.plist
- Press enter and enter your password if necessary.
- After this, restart your Mac.
Did you get Finder working again after these method(s)? Nice! Maybe now is the time to personalize your Finder with our tips. Read here how to make Finder clearer by zooming. If it didn’t work and Finder still doesn’t respond, we recommend contacting Apple.


