Using a computer can be complicated, especially in the event that problems appear that we do not know how to deal with. Windows is a fairly reliable operating system, which does not mean that certain errors may appear in some circumstances. One of these is the appearance of a black screen after performing an update.
And it is that there are not a few users who have been able to detect the appearance of a black screen for no apparent reason once we have carried out an update and subsequent restart of the system, either in Windows 10 or in Windows 11. Once this happens, we will surely not know how face it, although it is something that has a solution.
Why does a black screen appear when updating?
Carrying out system updates is highly recommended and must be carried out to guarantee the maintenance and optimization of the system and all its components, with improvements and correction of possible errors. However, there are some updates that are not well implemented and can have the opposite effect on our computer, such as the appearance of this black screen.
The reasons for what appears can be several, among which we can highlight:
-
Hardware problem: the cable that allows you to display the screen is not in good condition and connects correctly,
-
Display adapter problem: Drivers are corrupt or outdated.
-
Windows installation failed: The update installation did not complete.
Whatever the reason for the black screen when we update Windows 10 or Windows 11, the truth is that we need to be able to solve it. Since the causes can be several, there are various methods to try to solve it, so we must keep trying until we find the right one.
Steps to take back control of the PC
Next, we are going to see different actions that we can carry out to be able to take control of our PC once the black screen appears when performing an update in Windows 10 or Windows 11.
Pressing Ctrl + Alt + Delete allows you to continue using the PC
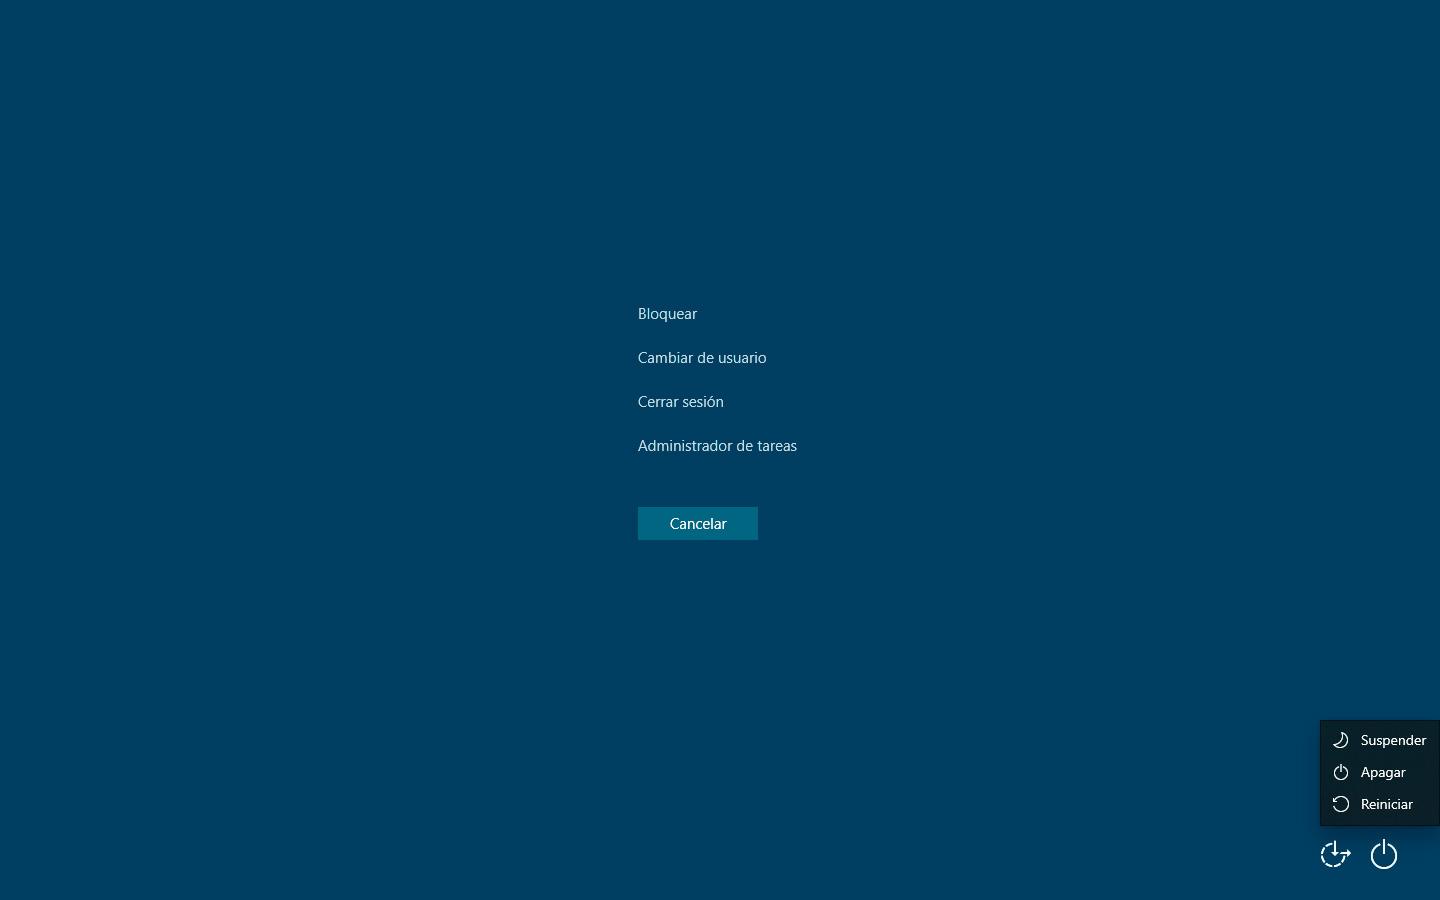
Once the black screen appears, we can no longer do anything and this prevents us from continuing to use the computer. That is why, if necessary, all we have to do is simply press the Control + Alt + Delete key combination. This will make the typical Windows lock screen appear and from there we can restart the computer.

Therefore, from among the available options we choose to Restart the computer, which should solve the problem. When we restart the computer we can see that the black screen no longer appears and that we directly have the desktop, or the login screen, under our control.
Restart Windows Explorer
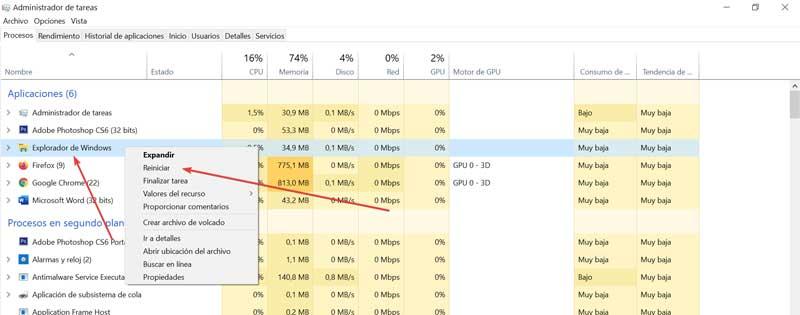
Alternatively we can use the key combination Ctrl + Alt + Del to open the options screen and here select the Task Manager, or use Ctrl + Shift + Esc which will open it directly. Once this is done, from the Processes tab, we scroll until we find Windows Explorer. We click on it with the right button and select Restart.

After a few seconds, this will restart Windows Explorer which should clear up the black screen and get everything working normally again.
Other ways to fix the problem
If for some reason we cannot take control of the computer after pressing Control + Alt + Delete, it is possible that the problem is due to the fact that the system has been blocked. In that case, there are some additional tips that we can try to try to fix the problem.
If we are using a wireless keyboard or mouse, we must try a wired mouse and keyboard, since the driver may not have been loaded correctly and that is why the Control + Alt + Del command is not sent correctly.
If it still doesn’t work, we can try restarting the graphics driver using the Win+Ctrl+Shift+B key combination. When you do this, a beep will sound and the screen will update.
Finally, if the computer has completely hung up and we cannot do anything, we can only disconnect the computer from the power. This is not recommended as it can cause problems to the data on the hard drive, but in times like this there may be no alternative.
We have control of the PC, but the problems continue
If after restarting the computer or taking control of it again we still have problems with black screens, or other types of errors that may be related to the Windows update, we can take the following actions to solve it.
Uninstall the latest update
As we have mentioned, the black screen problem is due to the last update installed, so it is recommended to uninstall it so that the system is completely stable again.
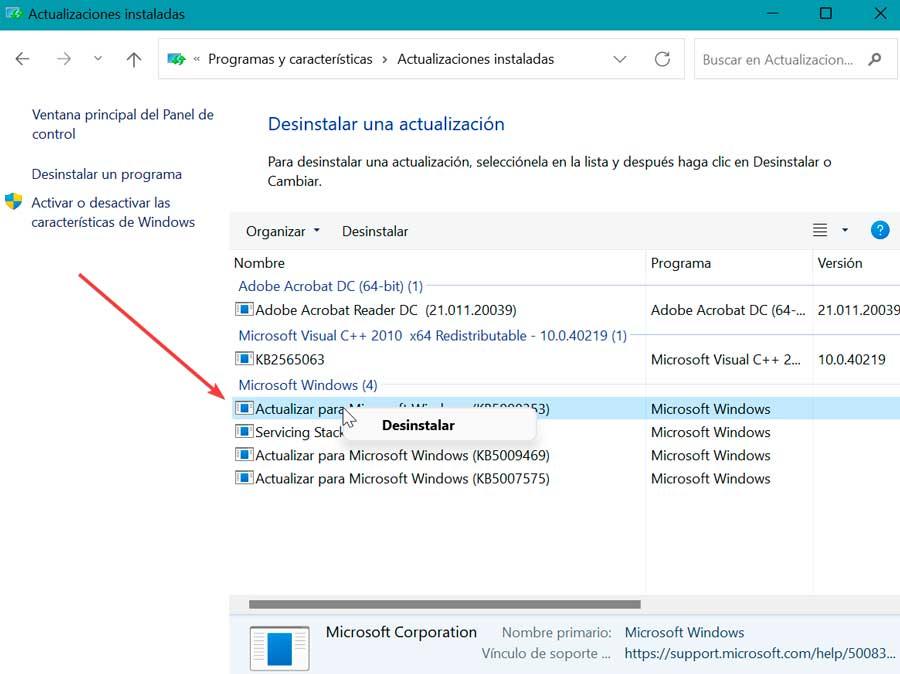
This is something that we can carry out from the Windows Control Panel, where we will click on its “Uninstall a program” section. Subsequently, in the upper left we click on “View installed updates”. Here you can see all those updates that we have installed in the system.

We go to the Microsoft Windows section, right-click on the most recent update, select “Uninstall” and follow the instructions that appear on the screen to complete the uninstall. Once finished, we restart to check if everything works normally again.
Change power options
Another option that we can perform is to change the power options, from the Control Panel. Here, within the plan that we use, click on “Choose the behavior of the on/off buttons” in the left column. Then click on change the currently unavailable configuration. Here we uncheck the box “Turn on fast startup (recommended)”.

Then, click on “Change plan settings”. On the new screen that appears, in the “Put the computer to sleep” section, we change it to Never, both by cable and on battery in case of using a laptop. Once finished, we restart the PC again.

Go back to a previous version of Windows
If we can’t get Windows to work properly again, we can choose to go back to a previous version of the operating system before the fateful update occurred. This can be done without fear of losing our stored files as the system will offer us the possibility to keep or delete them before starting.

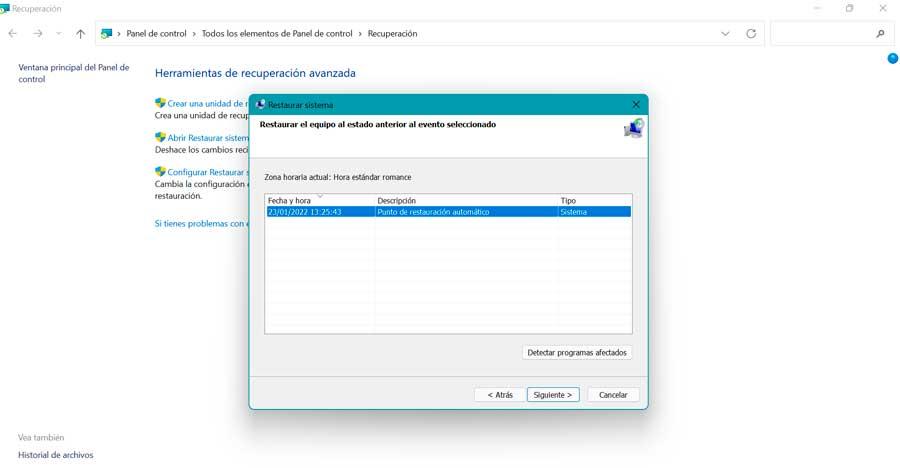
To perform the system restore we access the Control Panel. Here at the top right in the “View by” option, we select “small icons”. Now, we click on “System” and then on “Recovery”, located on the right side.

This will open another window where we must click on “Open system restore”. Later, in the new window that appears, we must click on “Choose a new restore point”. We select it and Windows will start the process. Once finished, we check that Windows works correctly again.


