")
Hikers will be happy with this improvement to Apple Maps in iOS 18. There were of course already good walking apps for the iPhone, but now Apple is also making its contribution. In this tip you can read about the possibilities and how it works. By creating a walking route in Apple Maps, we mean a more extensive version of just going from A to B. Of course, that has been possible for a long time. It’s also not quite the same as stops in Apple Maps, although it is somewhat similar. It is mainly intended to help you map out a beautiful route for a walk through nature or a city. After all, you don’t necessarily want to get from A to B the fastest, but rather walk a beautiful route through forests, along beaches or nice sights in the city.
Create a walking route in Apple Maps: choose your stops exactly
The useful thing about this new feature in iOS 18 is that you can choose your stops very specifically. You don’t need to know any addresses, because you choose on the map where the route should pass. That is how it works:
- Open Apple Maps and under your saved locations, tap X places, Y guides and Z routes where X, Y and Z represent numbers. After all, that is different for everyone.
- Tap Routes and then choose + Create route.
- A short animation will appear at the bottom of the screen with more context. The idea is to tap the stopovers on the map in order. Did you make a mistake? Then tap the arrow on the left.
- You have three buttons:
– Reverse: Swap the start and end points
– Round trip: Start a reverse route when the end point is reached
– Close loop: end with the fastest route from the last point to the starting point - Finished? Tap Route to start right away or tap Save to save the route for later.
- When saving the route you will be given the option to download Apple Maps for offline use. This comes in handy if you have to be careful with your internet use. You can also add a name and description.
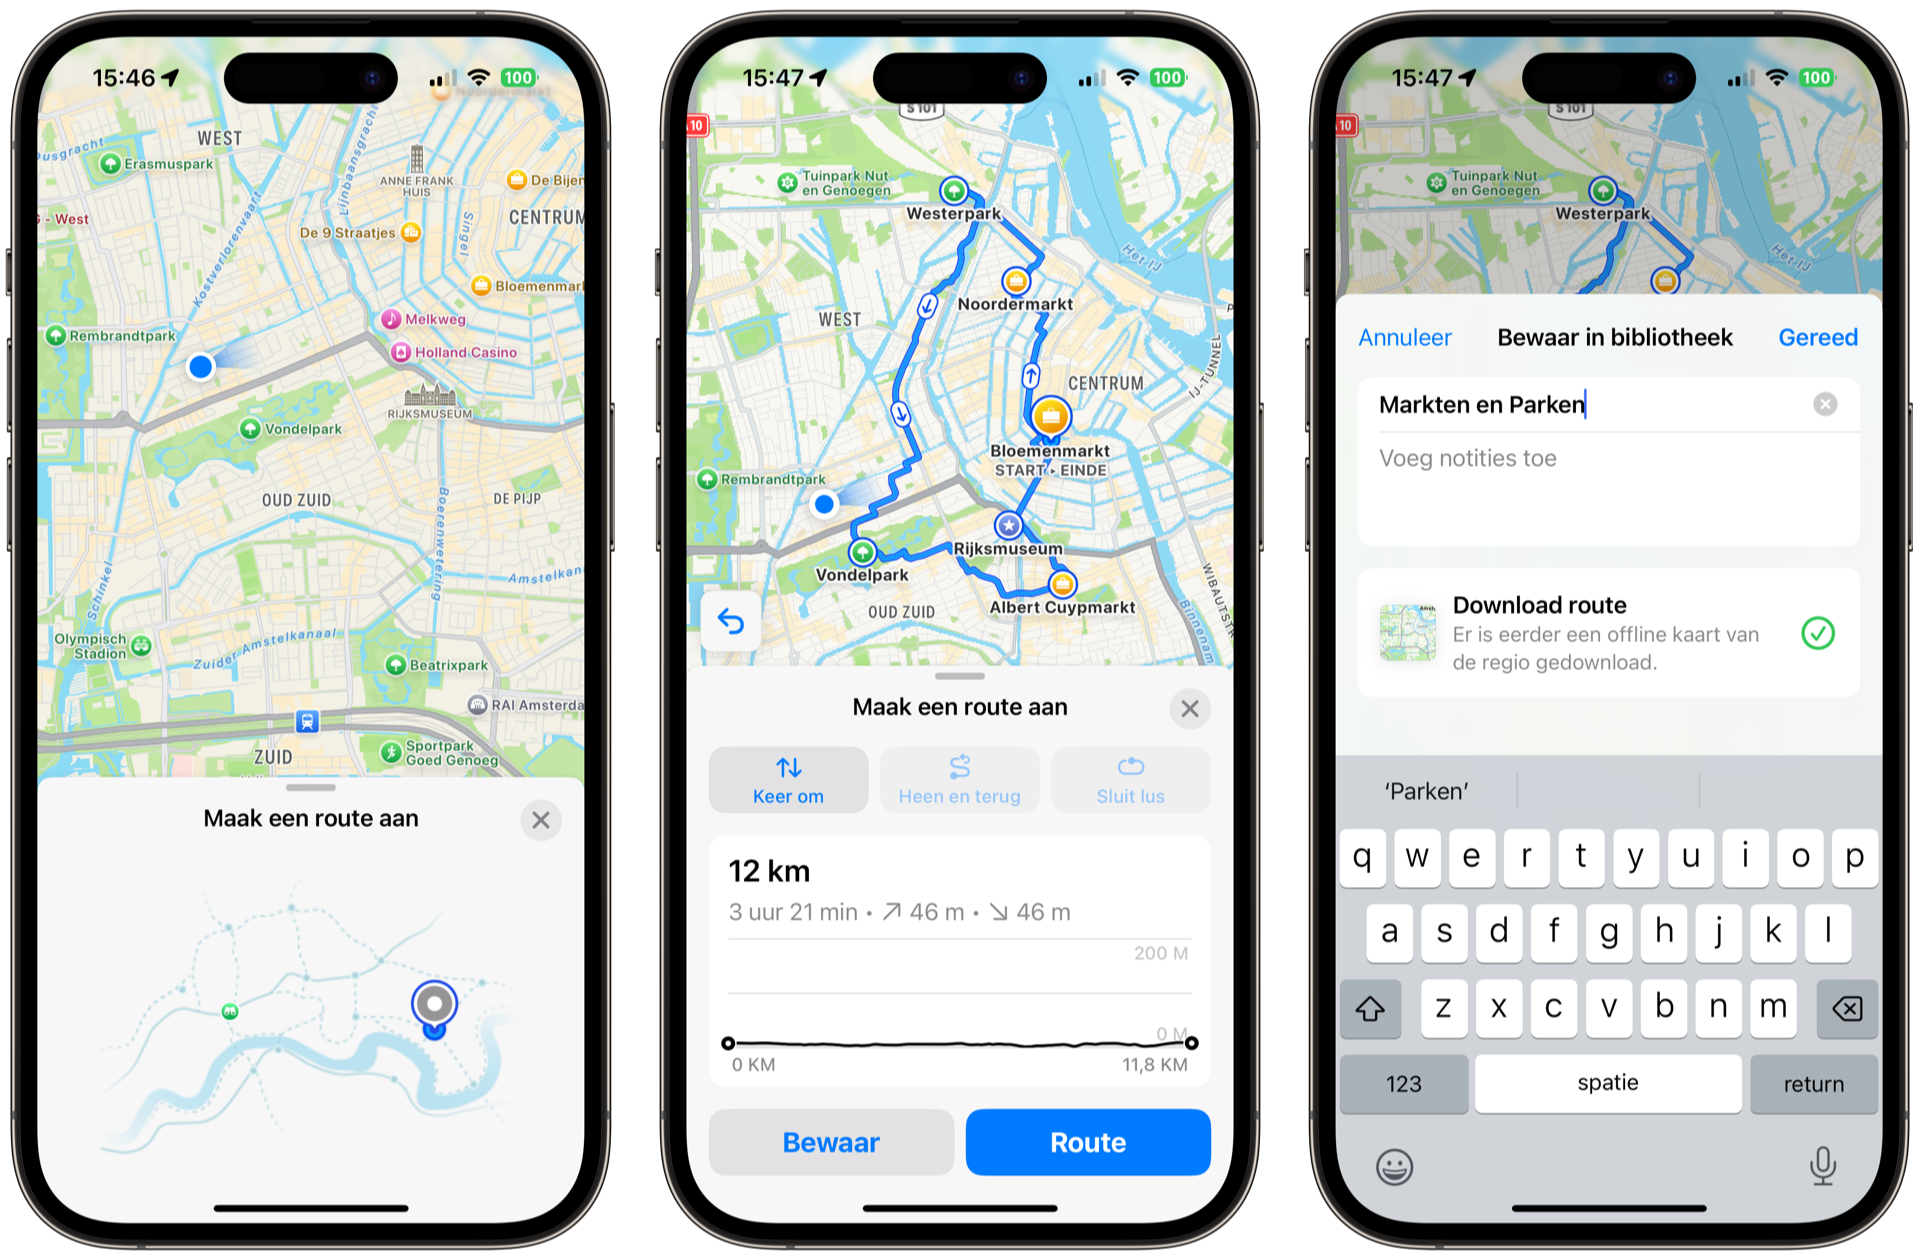
When your route is complete, you will also see the elevation profile, time length and distance of the route. When you start walking, it works just like a normal walking route. Unfortunately, it is not possible to share your walking route with others, so you will have to navigate with your own device. If you want to change the name or description of your route later, you can do this under the heading X places, Y guides and Z routes as in step 1 above.
In addition to the iPhone, you can also create a walking route in Apple Maps on the iPad and Mac. You need iPadOS 18 and macOS Sequoia respectively for this. Your created walking routes are synchronized between your devices.
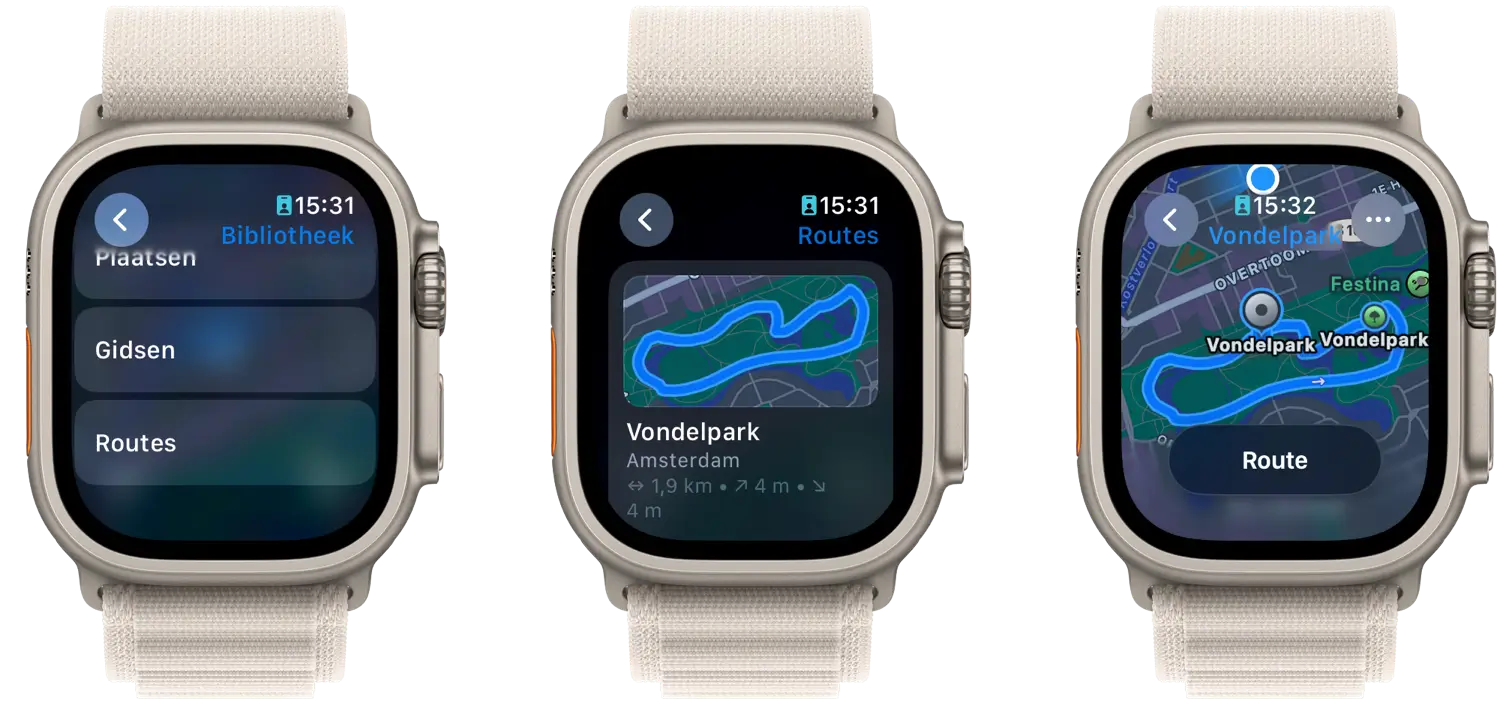
With watchOS 11, the walking route also appears on the Apple Watch. You can then create the route on your iPhone, iPad and Mac, after which you can leave your iPhone at home if you only want to go out with your Apple Watch.
More about iOS 18
iOS 18 is the major new iPhone update of 2024. In iOS 18 you will find numerous new features, including a redesigned Home screen, a redesigned Control Center and numerous innovations in standard apps such as Messages, Photos and Mail. There will also be a new Passwords app. Apple Intelligence, the new system for smart functions, is also an important part of iOS 18. The suitable devices for iOS 18 are the iPhone XS and newer. The release date of iOS 18 is scheduled for this fall. Until then, the iOS 18 beta is available.


